The model files created by the RWIND 2 program are called "Projects". The "Project Manager" helps you to organize all projects.
To open the "Project Manager," select Project Manager on the File menu or use the button
![]() on the toolbar.
on the toolbar.
The "Project Manager" consists of two tabs in which the "Project Groups" and the contained "Projects" are managed.
Project Groups
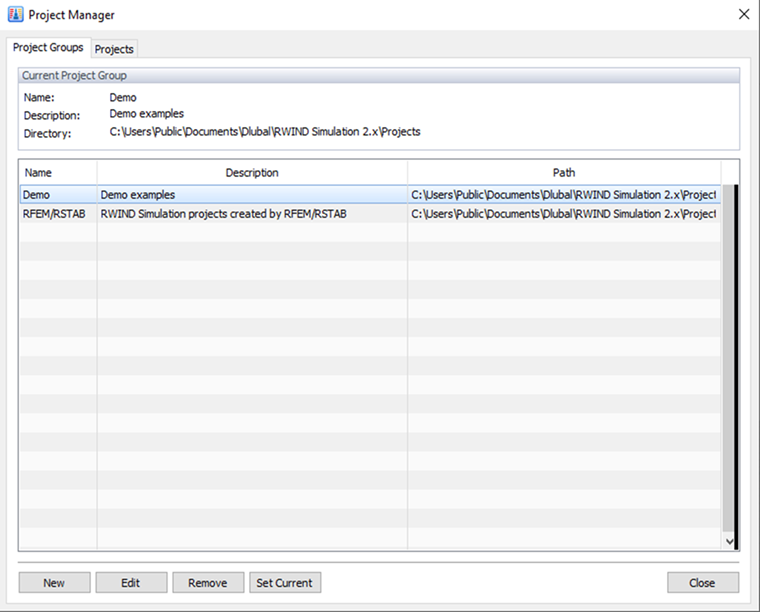
The first tab lists all project groups that have been created by the installation (Demo), by Dlubal applications (RFEM 6 / RSTAB 9), or by you. You can see the "Description" and "Path" of every project group. The current project group is highlighted. To change the project group, double-click the relevant line.
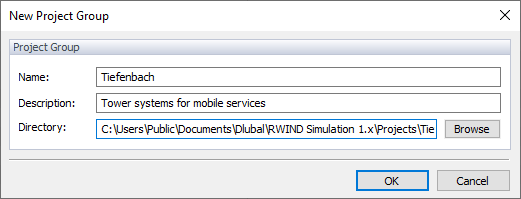
Use the button
![]() to create a new project group. Then specify the "Name," "Description," and "Directory" of the project group in a dialog box (see the image New Project Group).
to create a new project group. Then specify the "Name," "Description," and "Directory" of the project group in a dialog box (see the image New Project Group).
Projects
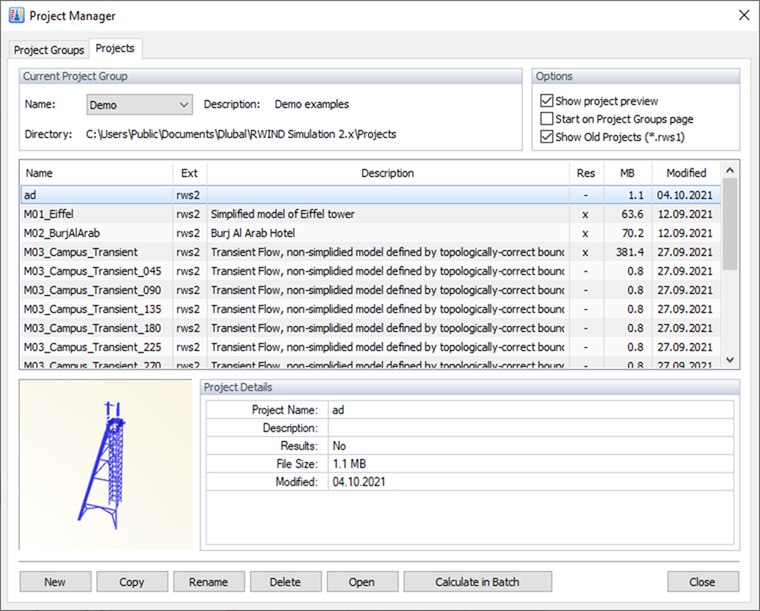
The current project group is set as the default. You can select a different project group in the list if you want to manage a new project in another folder. All projects contained in the current project group are listed in the table. You can see their names, descriptions, existing results, sizes and dates of modification. To sort the arrangement in a different manner, click the corresponding table header.
In the lower area of the Project Manager, you see a preview of the selected project and its details.
To open a project, double-click it in the list. You can also select it and use the
![]() button.
button.
Use the
![]() button to create a new project. Then, specify the "Name" and "Description" of the project in the dialog box (see the image New Project).
button to create a new project. Then, specify the "Name" and "Description" of the project in the dialog box (see the image New Project).
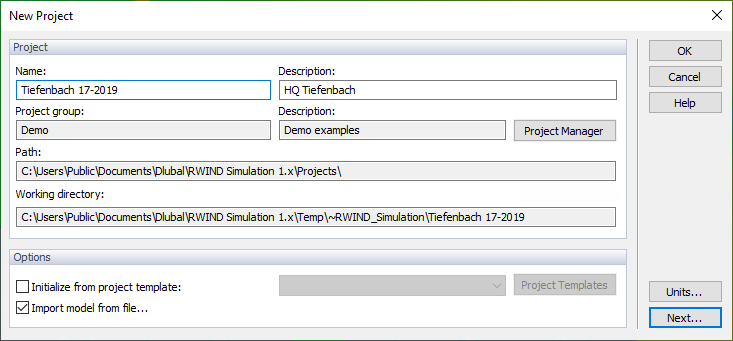
The current project group is preset.
The "Import model from file" option enables you to import data via an interface. If you want to create the model by yourself, however, clear this check box.
Click
![]() to open the "Import Model" dialog box. It appears when a model is to be imported.
to open the "Import Model" dialog box. It appears when a model is to be imported.
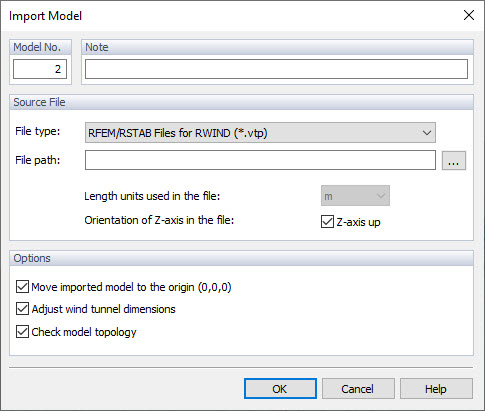
Specify the "File type". Currently, the RFEM 6 / RSTAB 9 data (a *.vtp file format), Stereo Lithography files (*.stl), Wavefront OBJ files (*.obj), and Industry "Foundation Classes" files (*.ifc) of version 2x3 are supported.
Set the "File path" and the "Length units". Make sure that the "Z-axis" is in accordance with the settings in RFEM 6 or RSTAB 9.
In the "Options" area, you can decide whether the model is to be moved to the origin and the wind tunnel dimensions are adjusted automatically to the size of the model.
Click
![]() to import the model file.
to import the model file.
If the model is to be created in RWIND 2 (instead of being imported from a file), clicking
![]() in the New Project dialog box opens the following dialog box.
in the New Project dialog box opens the following dialog box.
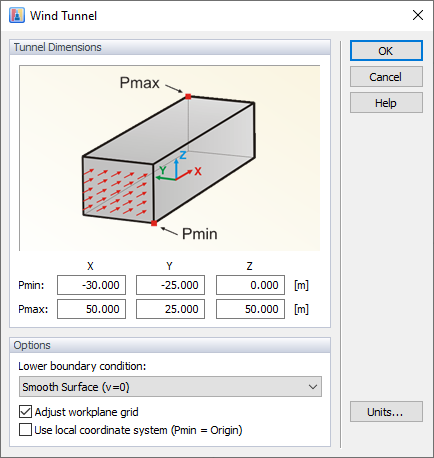
You can define the dimensions of the wind tunnel by means of six parameters. The dimensions in X, Y, and Z refer to the origin. Make sure that the wind tunnel is large enough around the model, notably the area behind it.
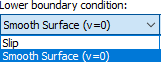
The "Lower boundary condition" applied to the bottom surface of the wind tunnel is set as a smooth surface by default. The surface roughness can be controlled by the material properties defined for the surface at the tunnel floor. When you select the "Slip" option from the list, however, the influence of the bottom plane is deactivated; that is, as if the model was far off the ground. You can then analyze parts of a building, for example, the top of a tower, without defining the entire object.
We recommend adjusting the work plane grid to the size of the wind tunnel.
Click
![]() to create the new project and start working.
to create the new project and start working.