Definizione dei vincoli interni delle linee
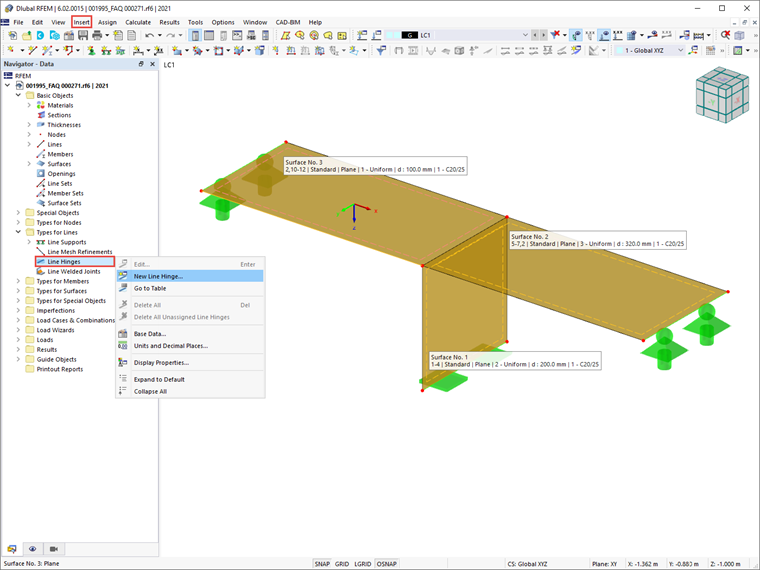
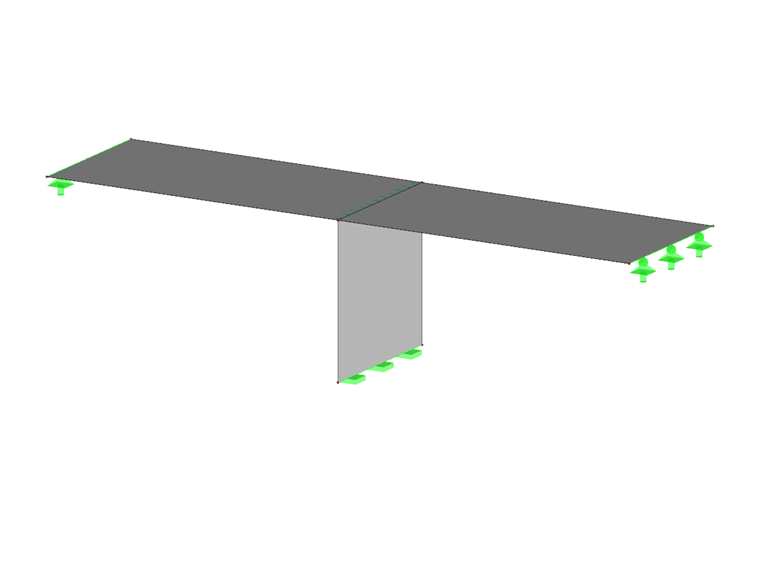
In RFEM 6, i vincoli interni delle linee possono essere definiti utilizzando il menu "Inserisci". Sono disponibili anche come "Tipi per linee" nel navigatore Dati (Figura 1). Il modo per definirli sarà descritto per il collegamento della struttura mostrata nell'immagine 1.
Per definire un vincolo interno di linea per superfici con una linea in comune, è necessario assegnare il vincolo esterno sia a una linea che a una superficie (come verrà mostrato più avanti). Un vincolo interno della linea può essere definito su qualsiasi linea di contorno della superficie, ma non su una linea integrata nella superficie, come avveniva in RFEM 5.
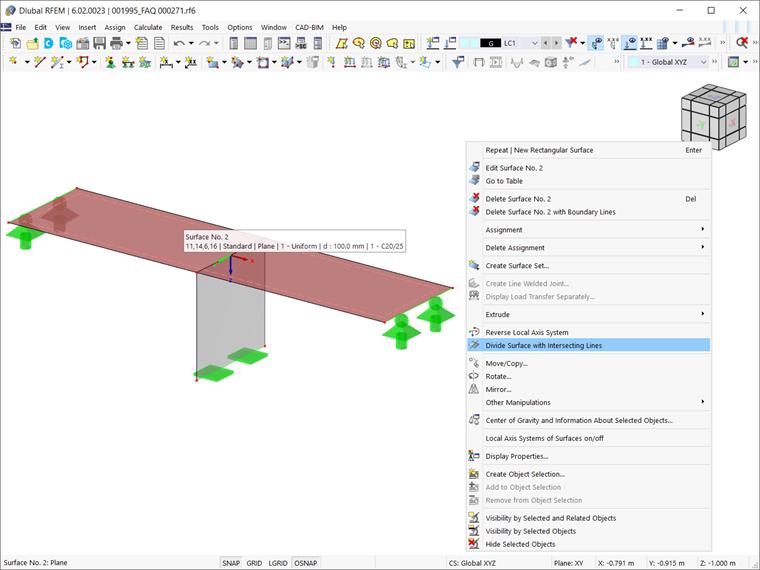
Per fare ciò in RFEM 6, è necessario prima dividere la superficie con una linea di intersezione per convertire una linea integrata nella superficie in una linea di contorno. Questo può essere fatto con l'aiuto della funzione "Dividi superficie con linee intersecanti" (Figura 2). Quindi, se c'è solo una superficie invece di due superfici separate (cioè solo la superficie nr. 2 nell'immagine 2), è necessario utilizzare l'opzione sopra menzionata per dividerla e ottenere due superfici separate, come nel caso di Superficie Nr. 2 e la superficie nr. 3 nell'immagine 1.
Condizioni del vincolo interno
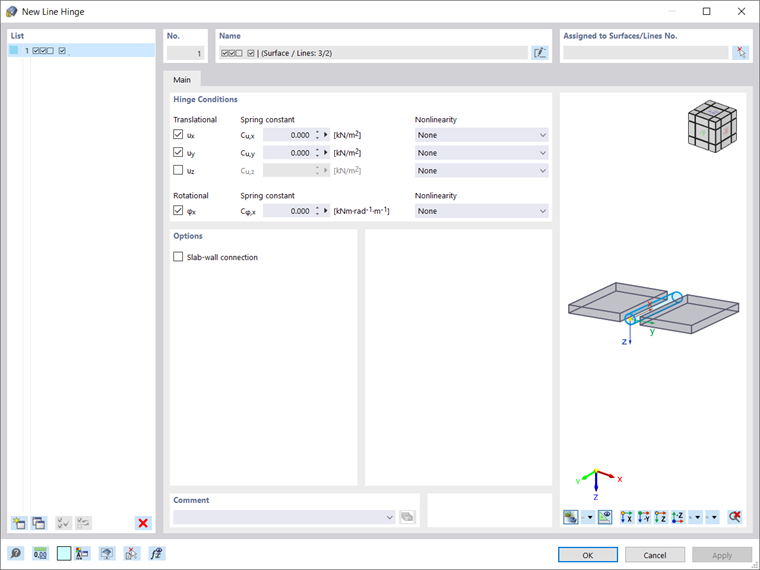
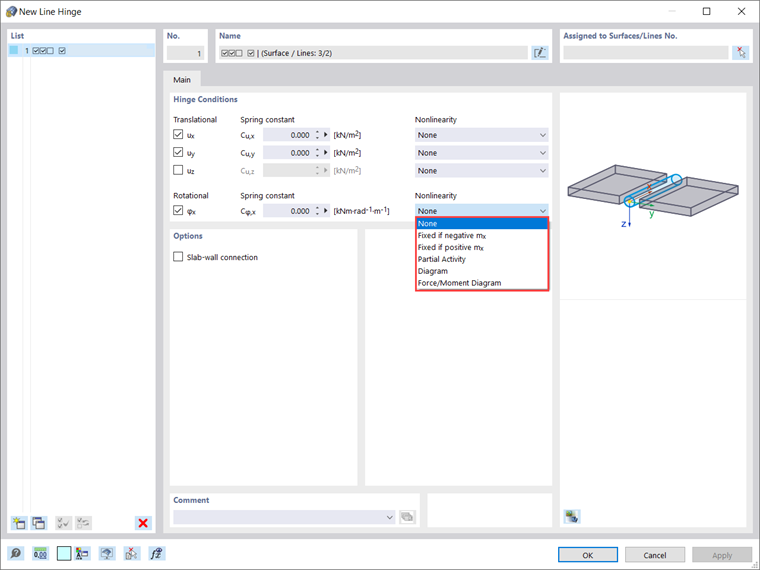
Definire i vincoli interni delle linee significa, infatti, controllarne i gradi di libertà. La scheda "Principale" della finestra "Nuovo vincolo interno della linea" controlla questi parametri di base, noti come "Condizioni del vincolo interno". A differenza dei vincoli esterni, il grado di libertà per i vincoli interni delle linee viene attivato selezionando la casella (per i vincoli esterni, il grado di libertà è quindi deselezionato). I gradi di libertà per i vincoli interni delle linee sono divisi in tre gradi traslazionali e uno rotazionale. Il primo descrive gli spostamenti nella direzione degli assi locali, mentre il secondo descrive la rotazione attorno all'asse della linea longitudinale.
Pertanto, per definire un vincolo, è necessario prima spuntare la casella di controllo per il rispettivo asse. Quindi, è possibile impostare la costante della molla traslazionale o rotazionale su zero, ma è anche possibile regolare la "Costante della molla" per modellare un vincolo elastico.
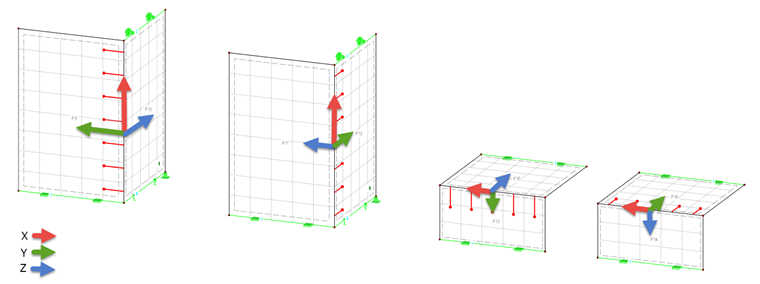
Si noti che le definizioni di svincolo del vincolo interno della linea non si riferiscono alle forze interne all'interno della superficie, ma al sistema di coordinate locale del vincolo interno della linea. I gradi di libertà si basano sulla seguente definizione dell'asse: l'asse x punta nella direzione della linea, l'asse y è la tangente al piano della superficie e l'asse z è la normale alla superficie. Quindi, il grado di libertà ux riduce la trasmissione della forza lungo il bordo della superficie e φx corrisponde a un giunto a cerniera.
Nella colonna "Non linearità" (Figura 5) della finestra di dialogo "Nuovo vincolo interno della linea", è possibile controllare in modo specifico il trasferimento delle forze interne e dei momenti per ciascun componente. Sebbene in questo esempio sia selezionato "Nessuno", le opzioni disponibili nell'elenco delle non linearità sono: “Fisso se negativo/positivo n/mx ” (cioè, è possibile controllare se l'effetto incernierato è dato solo per forze o momenti positivi/negativi); "Attività parziale" (ovvero, è possibile definire autonomamente il tipo e i parametri per le zone negative e positive); e "Diagramma" (ovvero, è possibile definire il numero di punti di definizione per il diagramma di lavoro inserendo i valori corrispondenti).
Per una cerniera φx con proprietà non lineari, è anche possibile definire un diagramma forza/momento (ovvero, è possibile definire i punti di definizione definendo i valori per la forza e i momenti massimi e minimi corrispondenti).
Nella finestra di dialogo "Nuovo vincolo interno della linea" (Figura 3 e Figura 5) puoi anche vedere l'opzione chiamata "Collegamento soletta-parete" (disponibile nella sezione "Opzioni"). È possibile attivare questa opzione per i collegamenti soletta-parete nelle strutture in muratura. In questo modo, è possibile gestire i parametri del vincolo interno della linea al fine di limitare la trasmissione dei momenti.
Ciò è necessario perché nel caso di collegamenti soletta-parete in strutture in muratura, i momenti non vengono trasferiti indefinitamente, ma solo in funzione delle forze assiali. Dato che questa opzione non è rilevante per l'esempio in questo articolo, sarà discussa in modo più dettagliato in un prossimo articolo della Knowledge Base sull'argomento specifico.
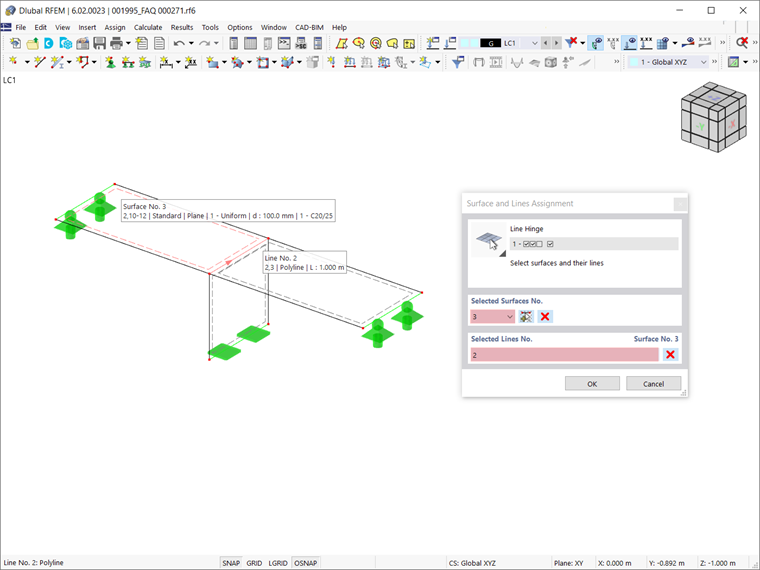
Una volta che tutti i parametri del vincolo interno della linea sono stati definiti, è necessario assegnare il vincolo esterno sia a una linea che a una superficie. In questo esempio, queste sono la superficie nr. 3 e la linea nr. 2. È possibile farlo utilizzando l'icona "Seleziona superfici/linee" nell'angolo in alto a destra della finestra di dialogo "Nuovo vincolo interno della linea"; seleziona semplicemente la superficie e la linea di interesse come mostrato nell'immagine 6.
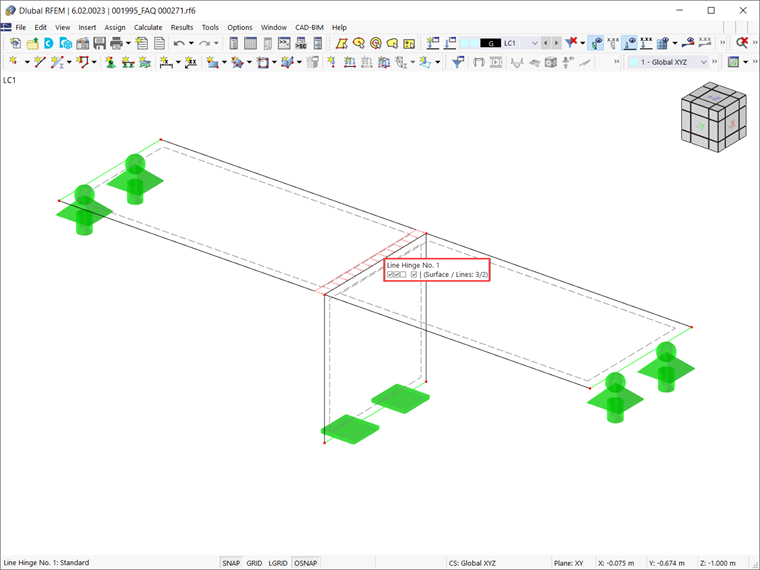
Il vincolo interno della linea generato in questo modo è finalmente disponibile nella finestra di lavoro di RFEM 6, come mostrato nell'immagine 7.
Sommario
I vincoli interni delle linee consentono di considerare correttamente il collegamento tra le superfici che si toccano su una linea. Questa considerazione si basa sulla possibilità di controllare determinati gradi di libertà, limitando così la trasmissione di forze e momenti interni.
In questo modo, è possibile considerare l'intero disaccoppiamento di superfici o accoppiamenti elastici per mezzo di molle lineari. Nella costruzione di calcestruzzo, i vincoli interni delle linee possono essere utilizzati per definire un gioco di assieme. Nelle costruzioni in legno, la modellazione con cerniere lineari è necessaria a causa della trasmissione delle forze rotazionali molto limitata.
