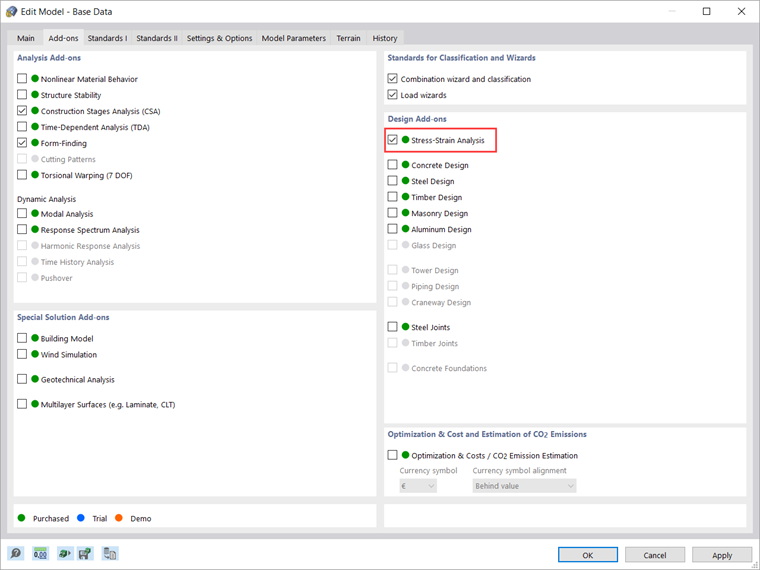
L'add-on Analisi Tensione-Deformazione è disponibile per l'attivazione nei dati di base del modello (Immagine 1). Una volta attivato l'add-on, il navigatore, le tabelle e le finestre di dialogo si estendono con nuove voci completamente integrate nell'interfaccia utente di RFEM/RSTAB.
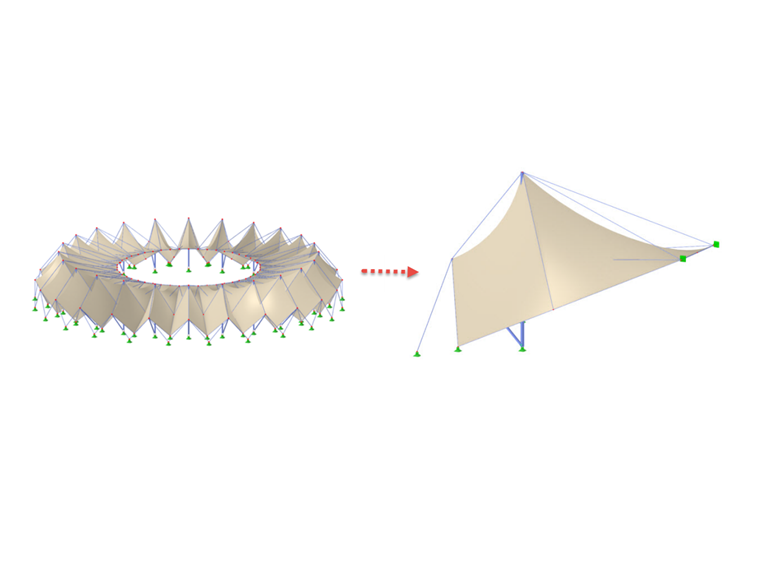
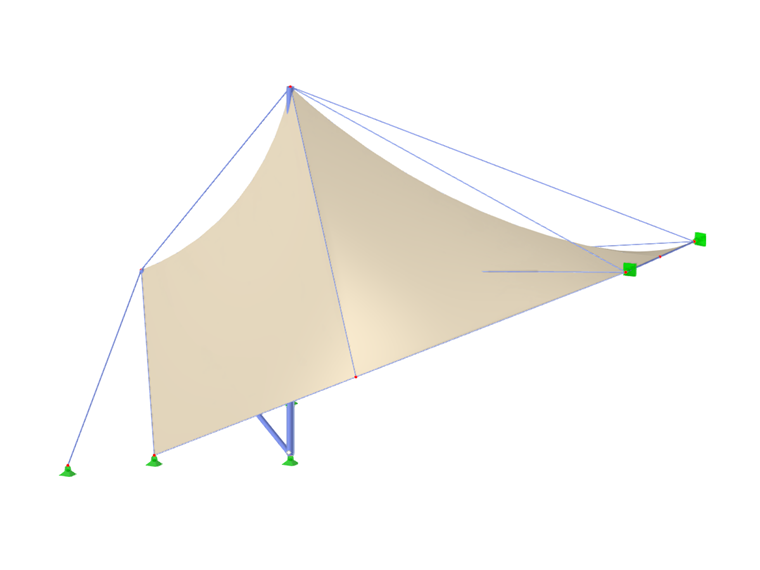
Questo articolo mostrerà un esempio pratico di come gestire i dati di input per le configurazioni di aste e superfici e svolgere l'analisi tensione-deformazione in RFEM 6. L'analisi sarà eseguita per un segmento di una copertura di stadio realizzata con membrane, mostrata nell'Immagine 2. In questo modo, è possibile verificare se i suoi elementi (modellati in precedenza nel programma) rispettano i requisiti di progetto, o se le loro proprietà devono essere riviste (ad esempio, riguardo sezione trasversale, materiale, spessore, ecc.).
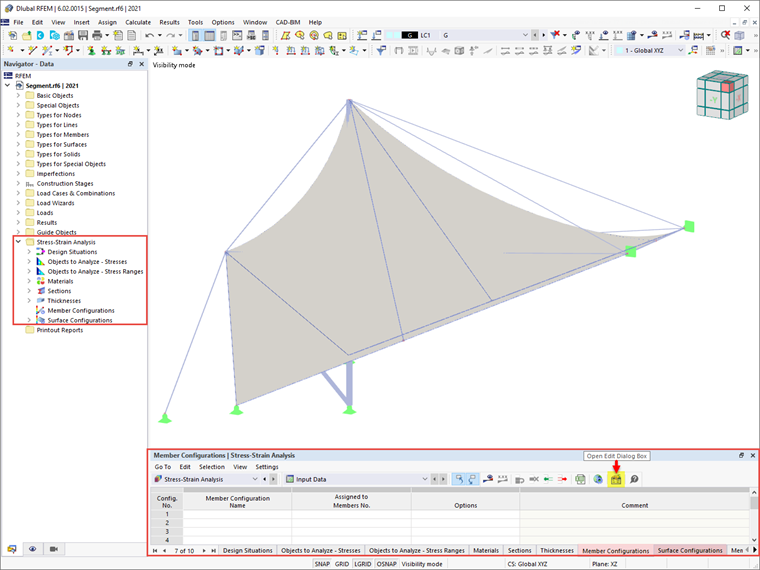
Come già accennato, gli oggetti della categoria Analisi Tensione-Deformazione sono disponibili sia nel navigatore che nella tabella per definire i dati di input per il progetto. Quindi, è possibile verificare gli oggetti da progettare così come i loro materiali e sezioni trasversali. A seconda dell'oggetto selezionato, possono essere definite configurazioni specifiche in cui è possibile specificare i valori limite e altre opzioni di progetto.
Poiché questo modello è composto da aste e superfici, tabelle specifiche per ciascun tipo di oggetto sono disponibili nelle impostazioni dell'analisi tensione-deformazione. Le impostazioni di configurazione possono essere accedute tramite l'icona "Apri finestra di dialogo di modifica" (Immagine 3) dove è possibile creare diversi tipi per ciascuna configurazione di progetto e assegnare la configurazione appropriata a ciascun oggetto.
Innanzitutto, è possibile creare una nuova configurazione di asta basata sui valori predefiniti dello standard di progettazione selezionato. Per farlo, puoi usare il pulsante "Nuovo" posizionato sotto la lista, che mostra tutte le configurazioni di questo stato limite disponibili nel modello. Poiché nessuna configurazione è stata ancora definita, questa lista è vuota (Immagine 4).
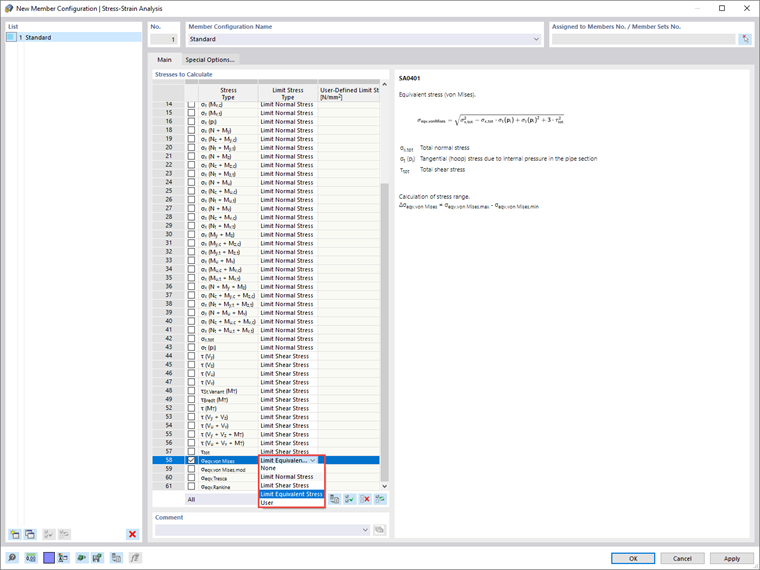
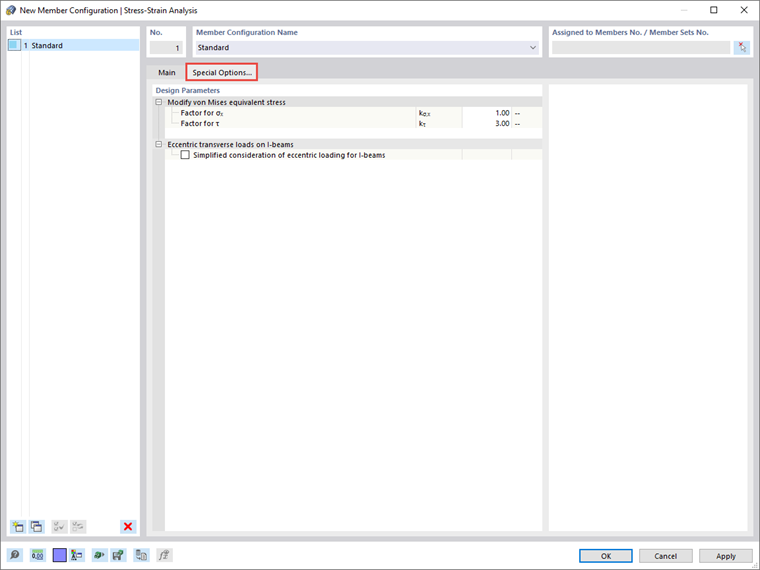
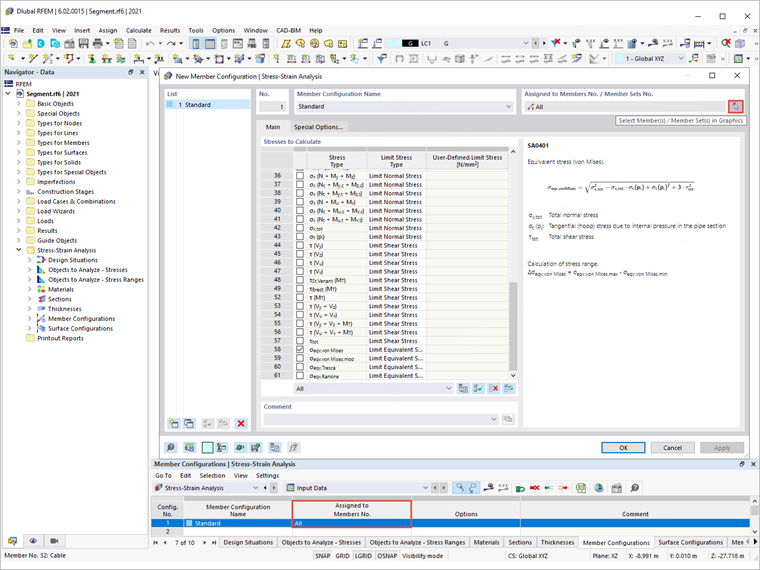
Puoi iniziare a definire la configurazione del progetto nella scheda "Principale" della finestra di dialogo selezionando le tensioni da calcolare e specificando le tensioni limite per il confronto. Ad esempio, puoi scegliere tra limitare la tensione normale, a taglio o equivalente, nonché specificare una tensione limite definita dall'utente. In questo esempio, la tensione equivalente di von Mises sarà selezionata per il calcolo, e puoi vedere la formula associata nella parte destra della finestra di dialogo.
Altre opzioni rilevanti per il progetto si possono trovare nella scheda "Opzioni Speciali" mostrata nell'Immagine 5. Pertanto, puoi modificare la ponderazione delle tensioni normali e di taglio nella tensione equivalente di von Mises specificando i fattori kσx e kτ.
Se i carichi trasversali sono applicati all'anima superiore delle travi, è anche possibile considerare i carichi trasversali agenti eccentricamente con un metodo semplificato per sezioni a I con cui il momento flettente Mz è completamente applicato alla flangia superiore per ciascuna sezione a I simmetrica laminata o parametrica del caso di progetto.
Una volta che la configurazione è definita, è possibile assegnarla agli oggetti rispettivi tramite il pulsante "Seleziona Singolarmente" nella finestra di dialogo in alto a destra, o direttamente nella tabella di input del calcolo tensione-deformazione per la configurazione corrispondente (Immagine 6). Inoltre, è possibile creare più configurazioni e assegnarle a diversi oggetti.
Le specifiche all'interno di una configurazione si applicano a tutti gli oggetti a cui questa configurazione è assegnata. Se nessuna configurazione è assegnata a un oggetto da progettare, non vengono effettuate progettazioni per questo oggetto.
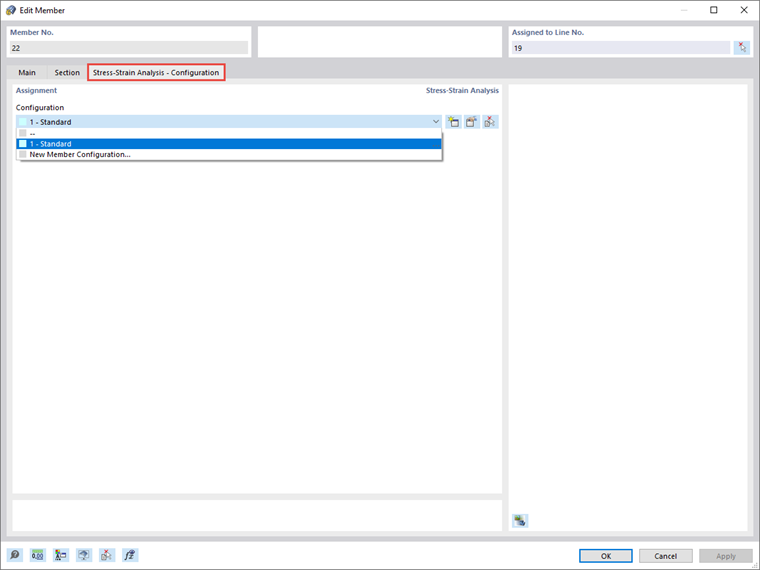
Le configurazioni di progetto sono anche incluse nella finestra di dialogo di modifica dei singoli membri, come mostrato nell'immagine 7. L'assegnazione può essere fatta nella scheda Configurazioni di Progetto della finestra di dialogo, dove puoi selezionare una configurazione esistente dalla lista, usare il pulsante "Nuovo" per creare una nuova configurazione o usare il pulsante "Selezione Multipla" per selezionare graficamente un altro oggetto da cui viene importata la configurazione rispettiva. Il menu di modifica della configurazione selezionata può essere aperto tramite il pulsante "Modifica".
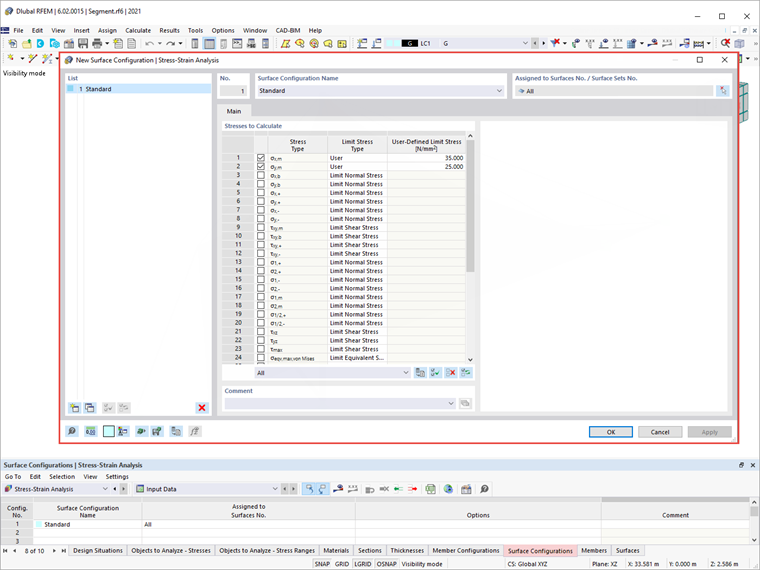
Nello stesso modo, puoi definire le configurazioni delle superfici tramite la tabella Analisi Tensione-Deformazione o la finestra di dialogo di modifica delle superfici specifiche. Puoi selezionare le tensioni da calcolare e specificare le tensioni limite come mostrato nell'Immagine 8. Per specificare una tensione limite definita dall'utente, seleziona il tipo di tensione limite "Utente". Questo attiva la "Tensione Limite Definita dall'Utente", dove puoi definire i valori di interesse.
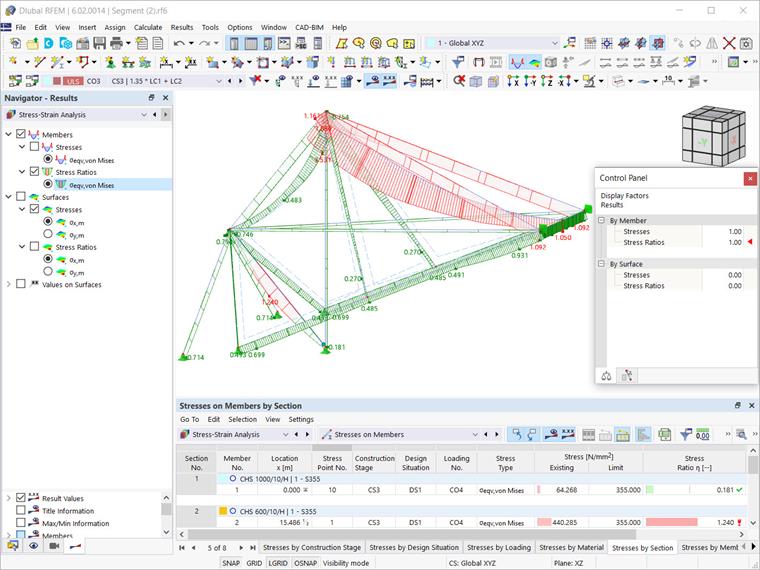
Altre impostazioni per l'analisi tensione-deformazione saranno definite in futuri articoli della Knowledge Base. Tuttavia, se esegui l'analisi con le configurazioni di asta e superficie definite sopra, otterrai i risultati mostrati nell'Immagine 9.
I risultati sono disponibili sia in forma grafica che tabellare. Puoi selezionare i risultati specifici da visualizzare nel navigatore Risultati, mentre i risultati dettagliati per aste e superfici si possono trovare nella tabella Analisi Tensione-Deformazione. In questo modo, puoi verificare se gli elementi soddisfano le verifiche di progetto o se devono essere modificati in termini di sezione trasversale, materiale, spessore, ecc.
