


Question:
How do I use the "Import Support Reaction" load wizard?
Answer:
Requirements
In order to transfer support forces from other models, two conditions need to be met:
- Both models must be in the same project (the same project ID).
- Both models must have different model IDs.
To ensure that the models have different IDs, it is necessary to create each model via "File → New…". As an alternative, you can also save the existing model as a copy via "File → Save As…"; thus, it obtains a different ID. The IDs can be viewed in the Base Data of a model.
Procedure
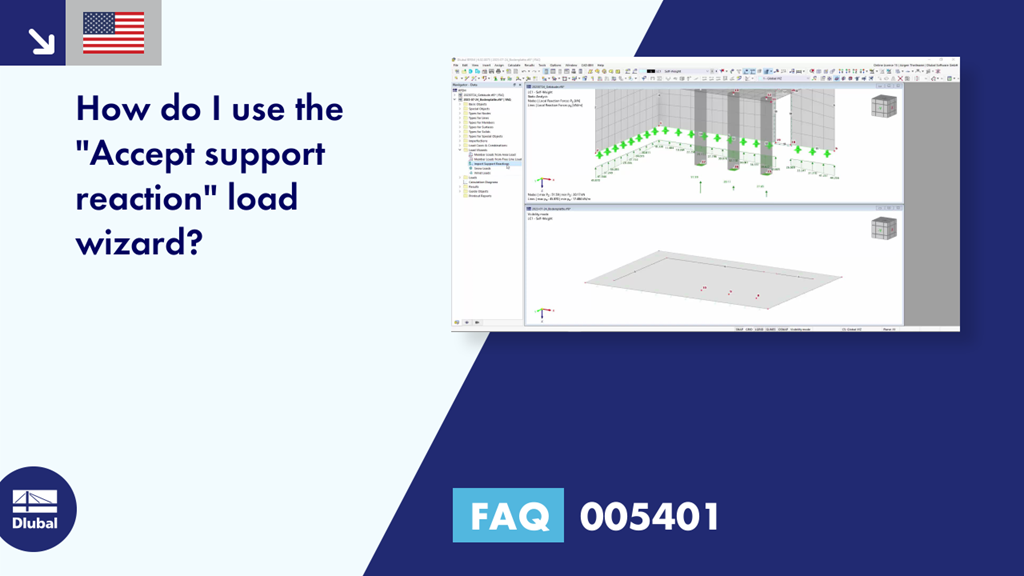
If the requirements are met, you can select the "Import Support Reaction" load wizard in the "child" model and assign the "parent" model there in the "Model" tab (Image 01).
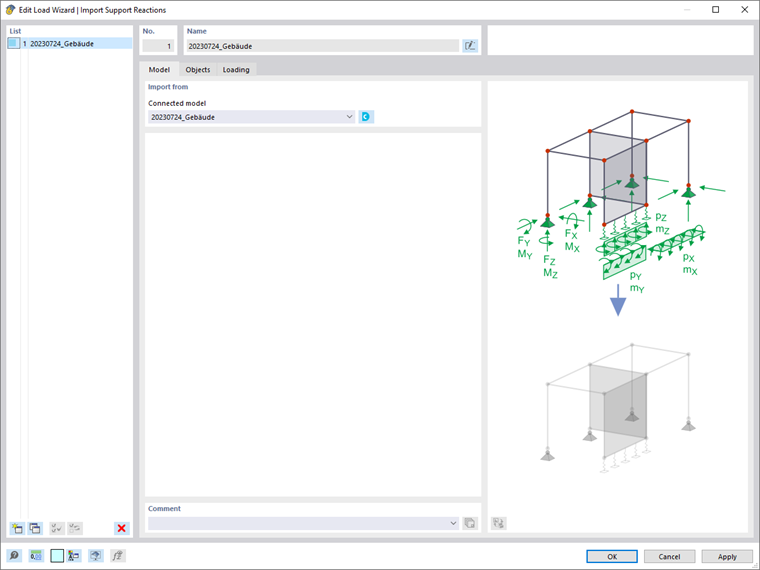
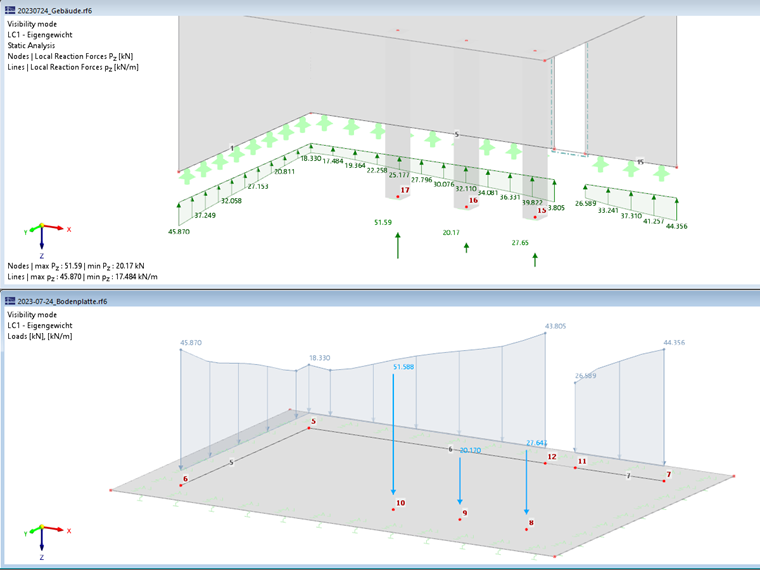
In the "Objects" tab, the assigned lines and nodes of the "parent" model are assigned to the lines and nodes to be loaded in the "child" model (Image 02).
Assigning Nodes and Lines
It is important to note that the nodes and lines are assigned using their numbering. Pay attention to the order of the entry and the orientation of the lines.
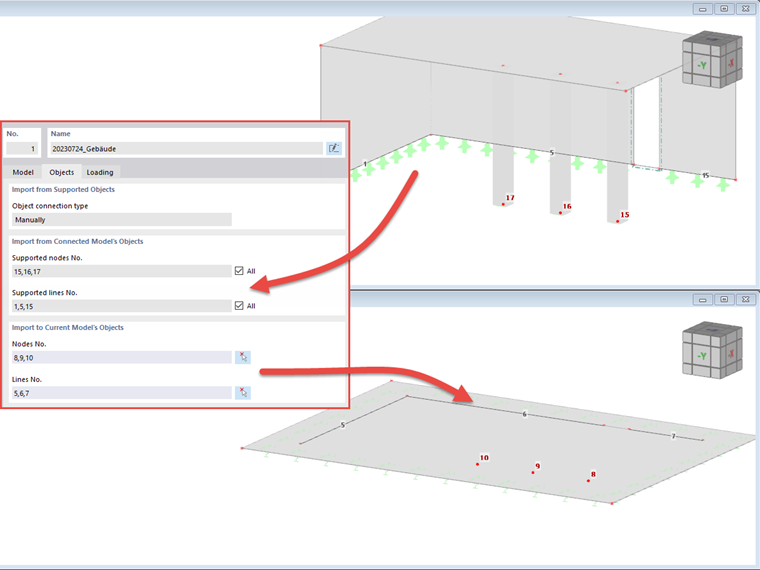
Finally, you can select the assignment of the load cases and the load directions to be imported in the "Load" tab. Image 03 shows a pure transfer of the vertical loads in Load Cases 1-3.
As soon as you confirm the load wizard, the applied loads appear with the value "??". The correct value is only displayed once the respective load case has been calculated (Image 04). This calculation also triggers the calculation in the "parent" model.
Changes in Source Model
If changes are made in the "parent" model, the load in the "child" model is reverted to "??", provided that the "parent" model has been saved. A recalculation of the load case in the "child" model transfers the new values.