Adjusting the Work Window and Grid
Before you start entering the model data, adjust the work window and grid to the conditions of the model. This makes it easier to set nodes and lines in the graphics.
Work Window
To maximize the work window, use the
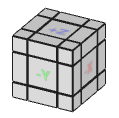
![]() button on the title bar. You can see the work plane with the XYZ-axes in the workspace. In its upper-right corner, the view cube is located.
button on the title bar. You can see the work plane with the XYZ-axes in the workspace. In its upper-right corner, the view cube is located.
You can change the view anytime by clicking one of the sides or corners of the view cube. To rotate the cube, point to it and hold down the left mouse key while moving the pointer.
Alternatively, use the mouse to change the view:
- To zoom in or out, rotate the mouse wheel.
- To move the work plane, hold down the wheel button and drag with the pointer.
- To rotate the work plane, hold down both the [Ctrl] key and wheel button and move the pointer. Rotating is also possible by moving the pointer while pressing the wheel and right mouse buttons at the same time.
Grid
You can see a grid of points and lines. It represents the work plane. For a new model, it is by default located in the XY plane.
To check the settings of the work plane and adjust the grid, click the
![]() button on the toolbar.
button on the toolbar.
The XY plane is set as the default work plane. When you define objects graphically, they will be set in the horizontal plane.
As the model is based on a grid of 15.0 ft, it is useful to adjust the grid lines of the work plane to this pattern. Enter 15 for 'n1' and 'n2' in the 'Grid Line Spacing' area. Additionally, enter 1.0 for 'b' and 'h' in the 'Grid Point Spacing' area. With a grid point spacing of 1.0 ft, lines are then displayed every 15.0 ft.
Click OK.


