


If any results are displayed, switch them off by clicking the
![]() button on the toolbar. Click the
button on the toolbar. Click the
![]() button to set the axonometric view.
button to set the axonometric view.
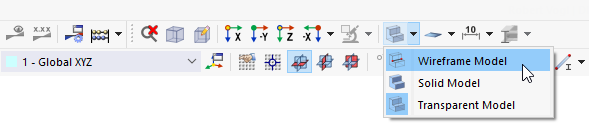
For a better view, select the Wireframe Model option, which you can access by clicking the
![]() button on the toolbar.
button on the toolbar.
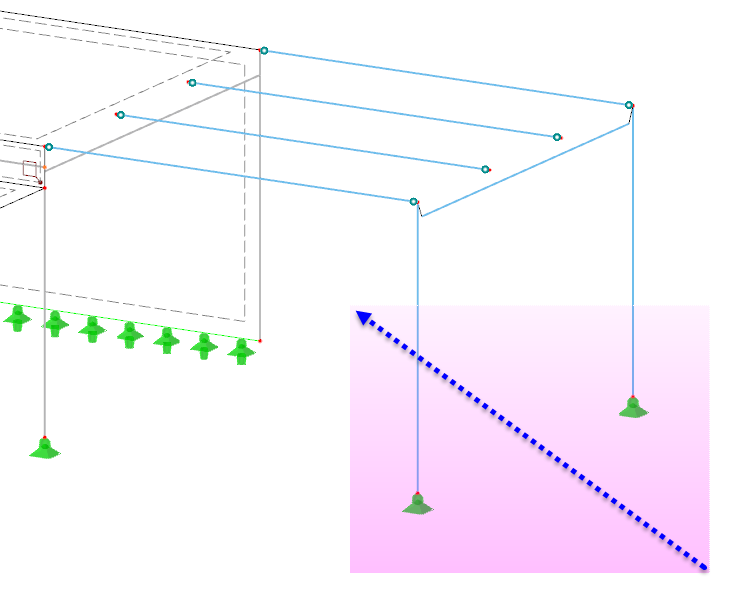
To select the two columns, draw a window across them from right to left. Do not capture any other members in the window.
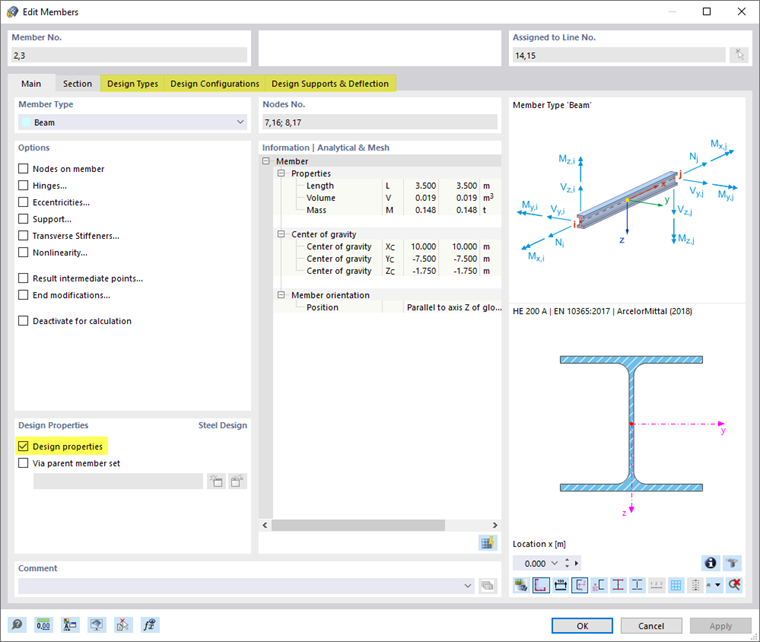
Double-click one of the selected columns to open the 'Edit Member' dialog box. On the first tab, 'Design properties' are enabled so that additional tabs are available to control the settings.
Effective Lengths
Select the Design Types tab.
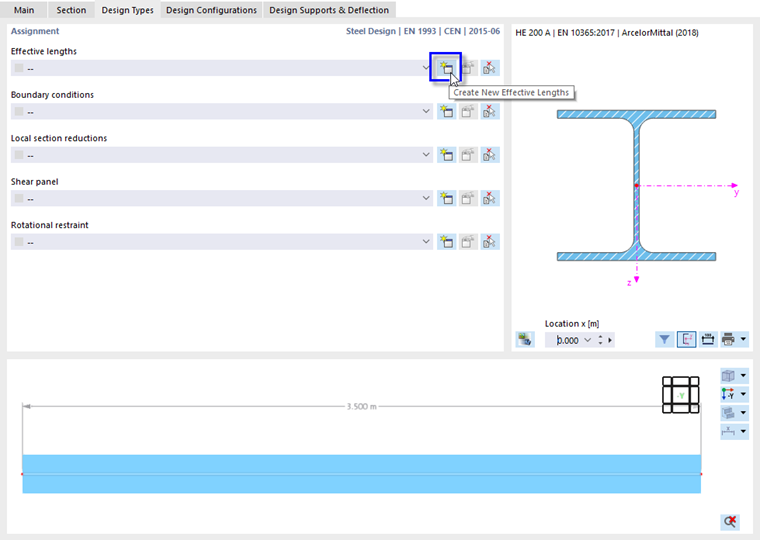
For the columns, the method for uniform members is to be used. Next to the 'Effective lengths' line, click the
![]() button to create a new length type. The 'New Effective Lengths' dialog box opens.
button to create a new length type. The 'New Effective Lengths' dialog box opens.
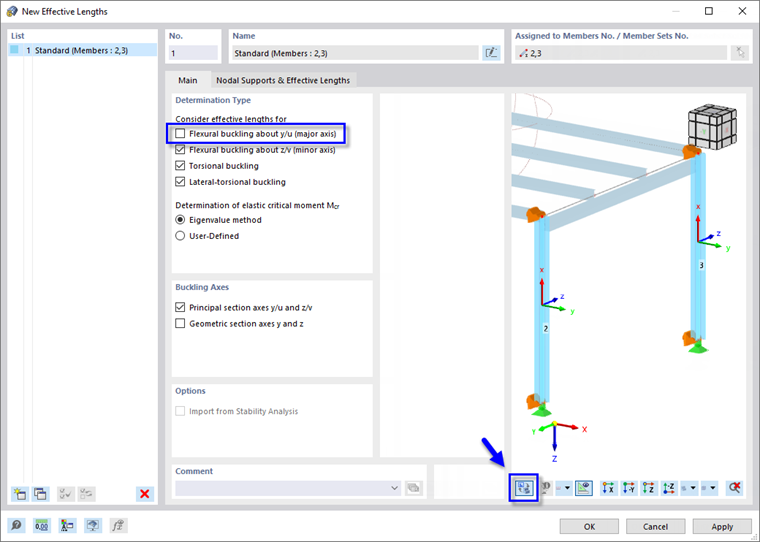
In the 'Consider effective lengths for' area, clear the Flexural buckling about y/u (major axis) check box. It is not required to verify flexural buckling in the plane of the frame because imperfections were defined in that direction (see Part 1).
To check the column axes, use the
![]() button in bottom part of the right area. The real view of the model is displayed.
button in bottom part of the right area. The real view of the model is displayed.
Select the Nodal Supports & Effective Lengths tab next.
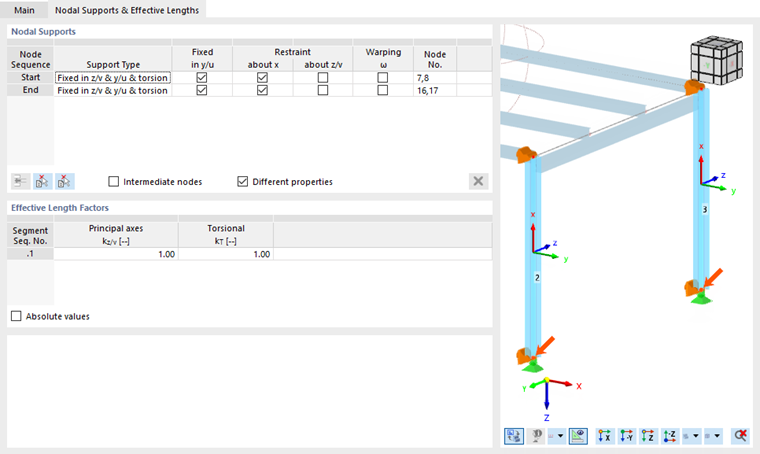
Supports are set at both member ends by default. The preset type is laterally fixed with a torsional restraint about the longitudinal axis ("forked"), yet free to warp.
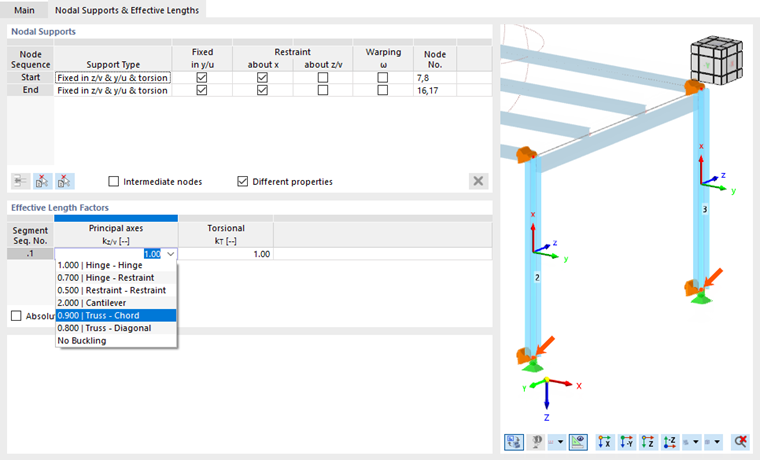
In the 'Effective Length Factors' area, the factors are set as 1.0. They represent a hinged-hinged model concerning buckling. One might consider the elasticity of the column heads by increasing the buckling length factors, but assuming fixed supports is adequate for the tutorial.
Click OK to close the dialog box and return to the 'Edit Members' dialog box.
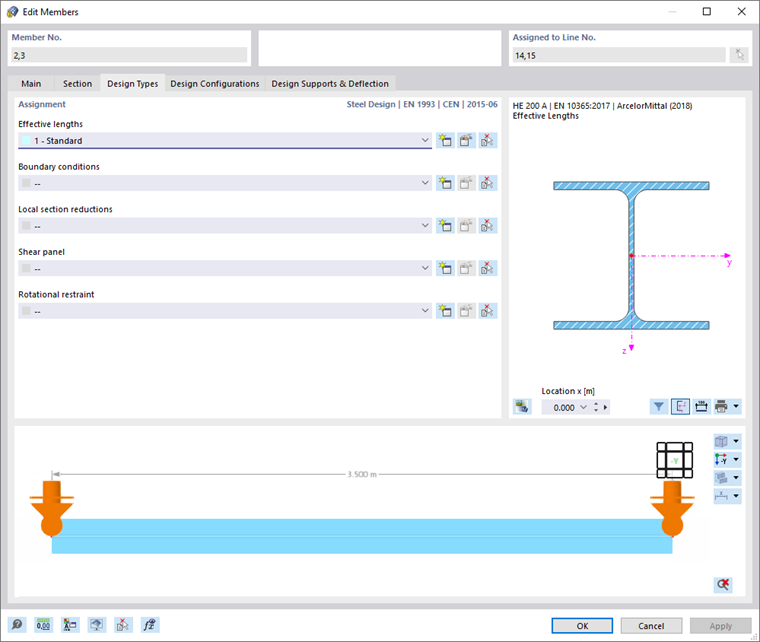
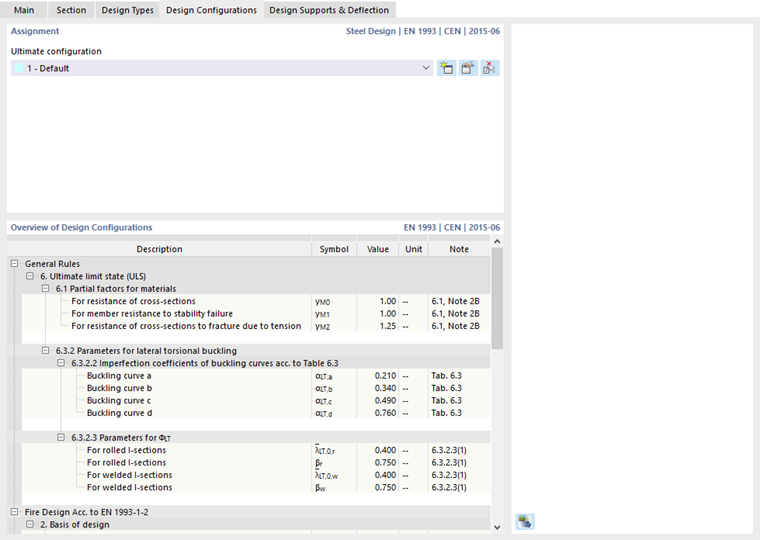
Design Configuration
Finally, select the Design Configurations tab. The 'Default' ultimate configuration is preset (see the 'Main' Settings of Ultimate Configuration image). It would be possible to define a new configuration and apply it only to the columns, but this is not required for the tutorial.
Click OK to assign the effective lengths and close the 'Edit Members' dialog box.