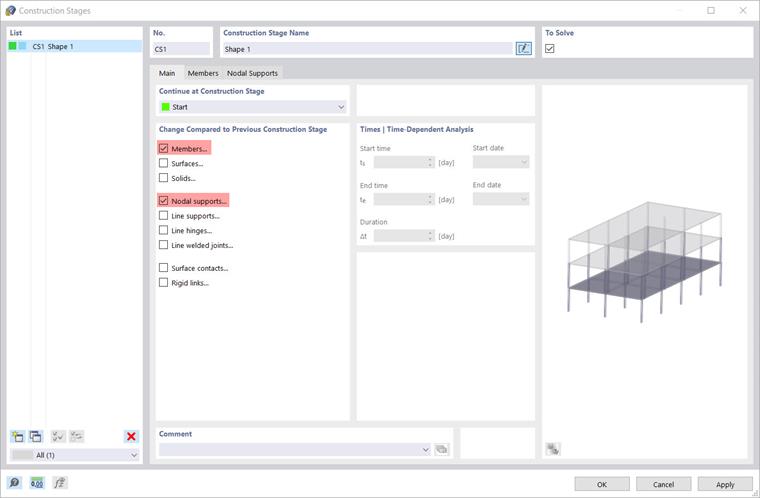
As has already been mentioned, separate construction stages should be defined for the primary and secondary structures. In RFEM 6, the construction stages are managed in the "Construction Stages" dialog box, which can be opened by using the Navigator - Data.

In the "Main" tab of the dialog box, it is necessary to specify the structural elements which will be changed in the construction process. For example, if a surface is to be added in the current construction stage, it is necessary to select the "Surface" option. By selecting an element in the "Change Compared to Previous Construction Stage" section, a corresponding tab is added in the dialog box, where you can then make the appropriate selection and detailed settings. To define the first construction stage (called "Shape 1" in the example), select the "Members" and "Nodal Support" check boxes.
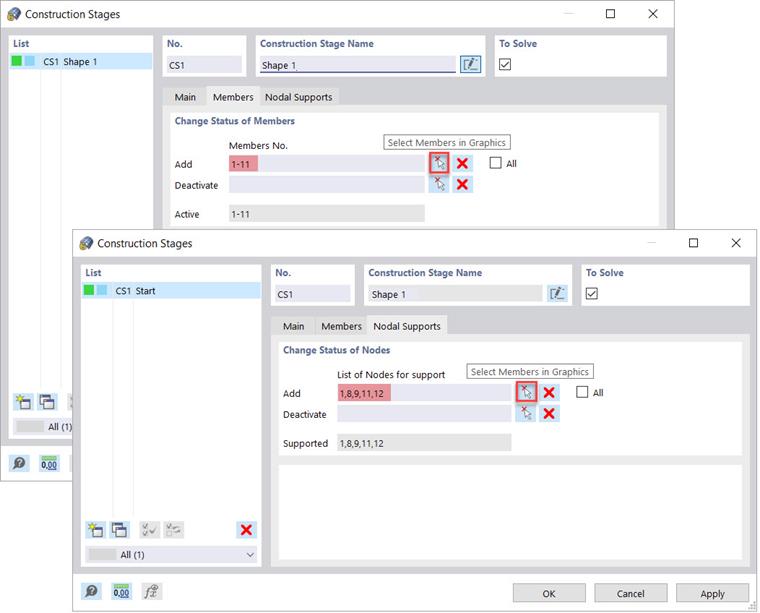
Adding and deactivating structural elements works relatively similarly for various elements. As soon as the corresponding tabs for the elements have been activated under "Change Compared to Previous Construction Stage" in the "Main" tab, the elements to be activated or deactivated can be specified there. The objects can also be selected graphically using the
![]() button. The selection can be canceled by clicking the
button. The selection can be canceled by clicking the
![]() button. All objects that have already been activated in the previous or the active construction stage are displayed under "Active". In this example, the previously defined elements and nodal supports are to be activated for the first construction stage.
button. All objects that have already been activated in the previous or the active construction stage are displayed under "Active". In this example, the previously defined elements and nodal supports are to be activated for the first construction stage.
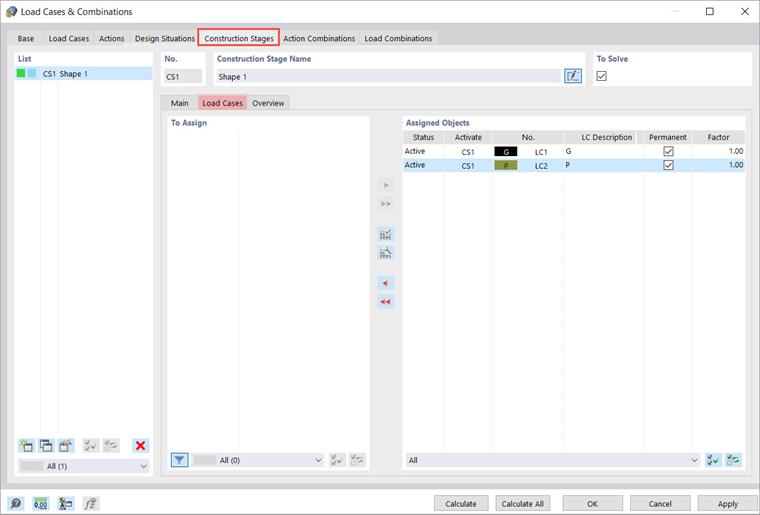
In the next step, the load cases that should be taken into account are to be assigned to the construction stage. You can do this assignment in the "Load Cases and Combinations" dialog box, "Construction Stages" tab, and "Load Cases" subtab. Here you will find a list of all available load cases for the selected construction stage. Click the
![]() button to assign a load case to the construction stage as "permanent", or the
button to assign a load case to the construction stage as "permanent", or the
![]() button as "non-permanent". The load cases can also be assigned individually by using the
button as "non-permanent". The load cases can also be assigned individually by using the
![]() button, or completely with a construction stage. Based on the load case type, you can decide whether the load case is classified as "permanent" or "non-permanent".
button, or completely with a construction stage. Based on the load case type, you can decide whether the load case is classified as "permanent" or "non-permanent".
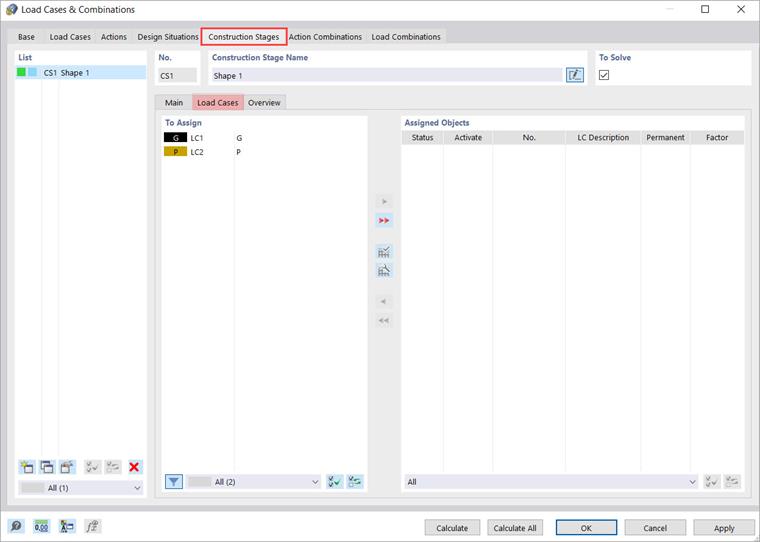
In the first construction stage, both load cases are to be regarded as "permanent". In this way, these load cases are "memorized" in the system and their actions (stresses and strains) are transferred to the subsequent construction stages. In contrast, non-permanent load cases are only effective in the construction stage to which they are assigned.
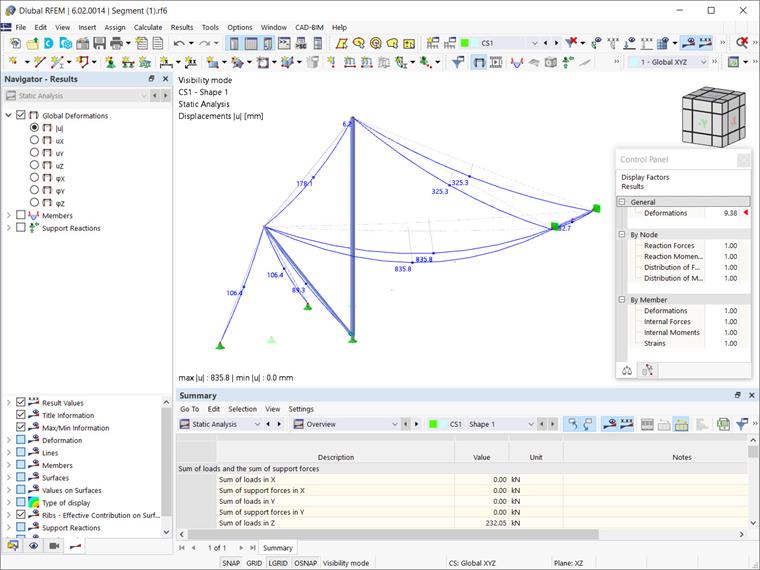
Finally, you can use the "Calculate" button to analyze the respective construction stage. The result of the calculation is shown in the Image Shape 1.