


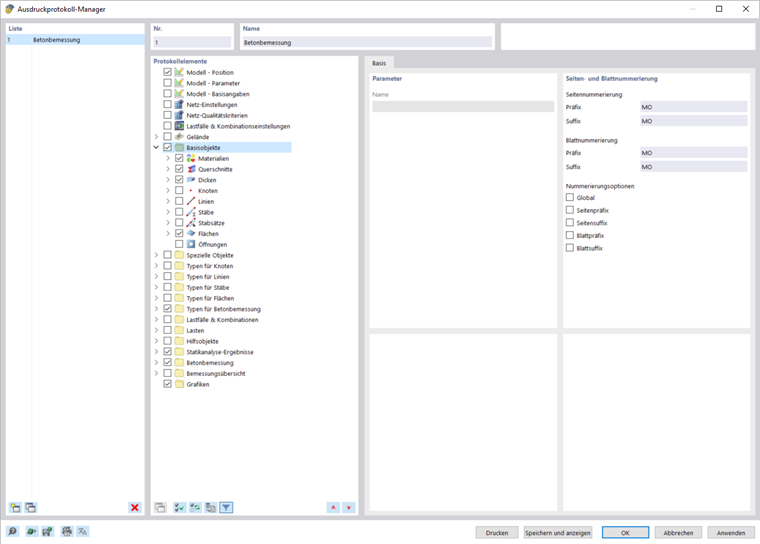
Creating Printout Report
You can create a new printout report using the
![]() button in the toolbar. A printout report manager opens first, where you can specify which information should be included in the report. After confirming your settings by clicking "Save and Display", the printout report appears in a new window, which allows you to work in the main program and in the printout report at the same time.
button in the toolbar. A printout report manager opens first, where you can specify which information should be included in the report. After confirming your settings by clicking "Save and Display", the printout report appears in a new window, which allows you to work in the main program and in the printout report at the same time.
Inserting Graphics
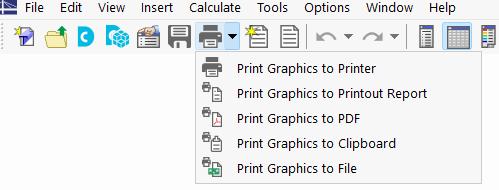
You can use the
![]() button to print the previously defined and current views in the printout report, if you have opened them in the main workspace.
button to print the previously defined and current views in the printout report, if you have opened them in the main workspace.
A dialog box appears where you have various options for customizing the image display. Among other things, you can also select the print area in the graphic by using the selection arrow in the "graphic image" area.
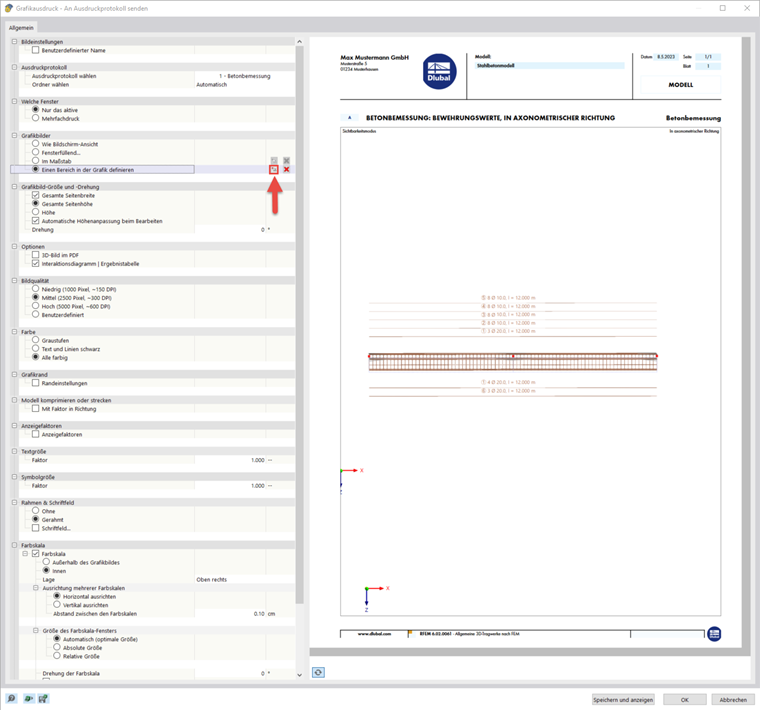
The inserted images are placed at the end of the printout report by default, but you can easily move them to any position using drag & drop.
Multi-Print
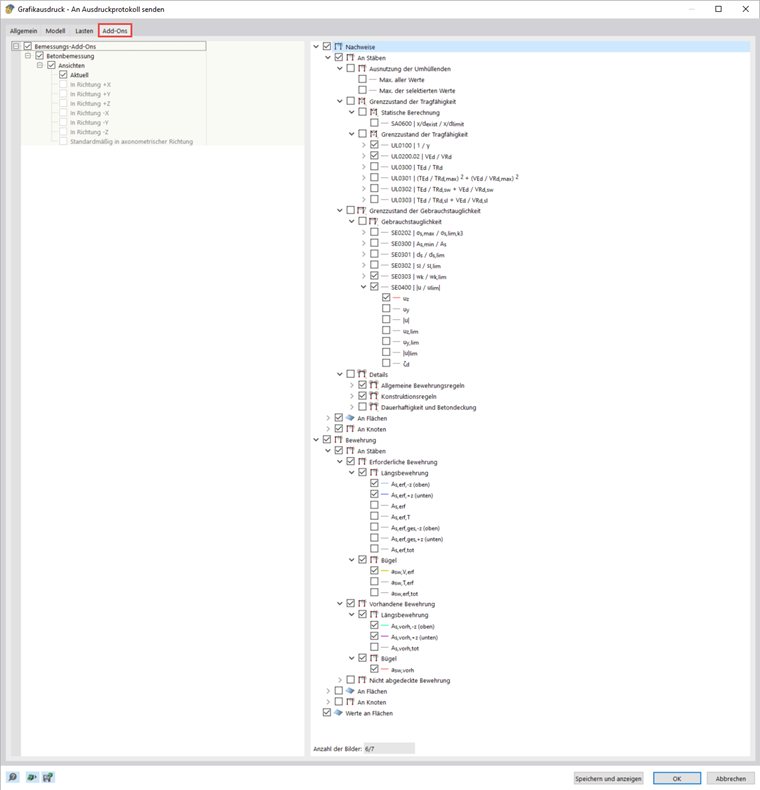
You can use the current view for a mass print in order to generate graphics for loads, internal forces, and design results. To do this, activate the Multiple Print check box in the Graphic Printout dialog box.
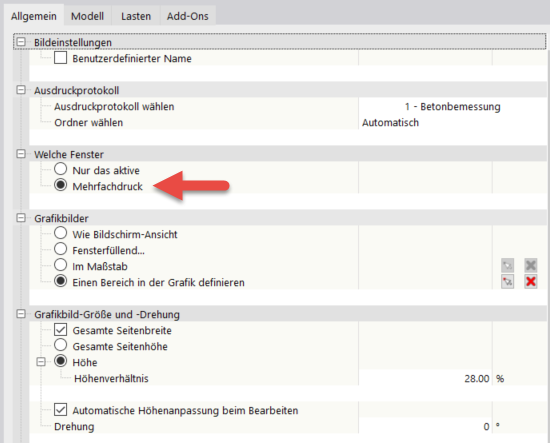
The dialog box includes additional tabs that you can use to select which graphics are to be generated, similarly to the Navigator. Below the selection options, you can see how many graphics you would print with your previous selection. In the webinar, multi print was used to quickly and clearly transfer the design and reinforcement results of the beam to the printout report.
Creating Plots
If you want to print out the individual graphics in a larger format, you can also use the printout report. First, create a new printout report and deactivate all elements by clicking
![]() and then
and then
![]() .
.

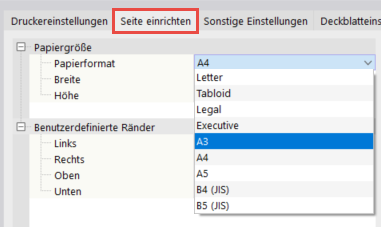
Then, open the "Printer & Page Settings" and select a printer in the "Printer Settings" tab, which can print any paper format, and specify the paper orientation. You can then specify the format in the "Page Setup" tab. The cover sheet and the preview image can be deactivated in the cover sheet settings.
The printout report provides you with many other options for the individual management of the results. Detailed explanations can be found in the RFEM 6 Manual.