


To get the best results from our numerical simulation, it is a good idea to check a few important things before running the calculation. These are discussed in the following subsections.
Detection of Overlapping Triangles
The original model may contain "double triangles", i.e. overlapping triangles that lie in the same plane; see image below.
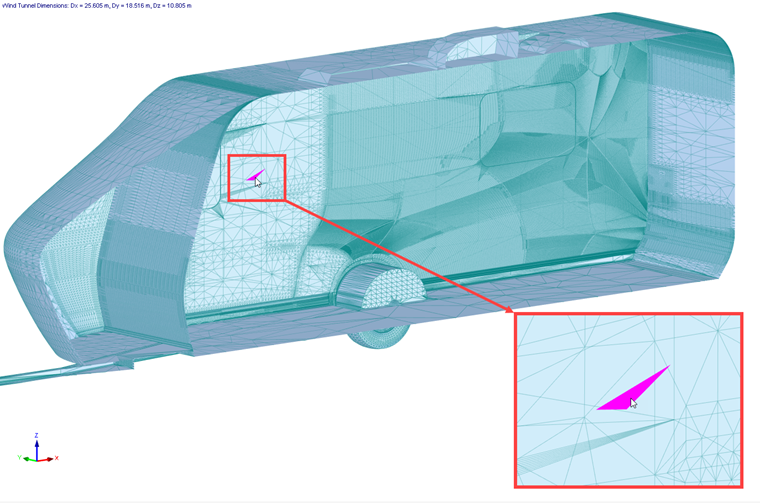
The overlapping triangles can lead to incorrect results, because the resulting pressure can be extrapolated to all these triangles and the total drag force acting on the model can be increased by this pressure. The check of overlapping triangles is activated automatically after the model import (see the chapter Import Models) or it can be run manually from the menu; see Image below.
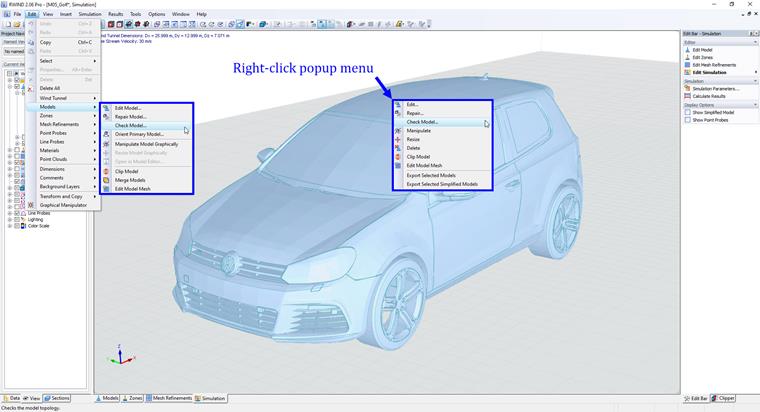
When you click on Model Check, a new window will open where you will find the conclusion and information about the number of overlapping triangles and their area.
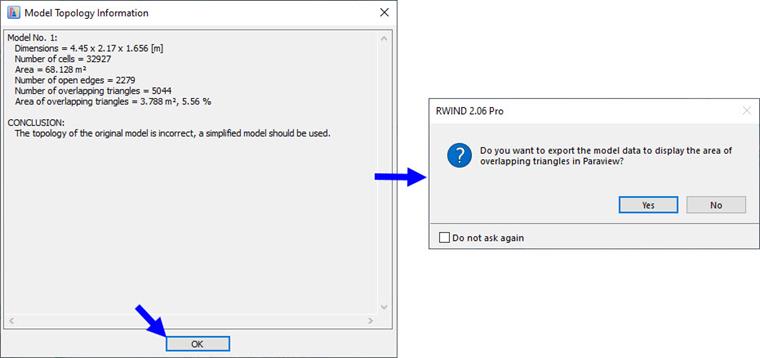
The model data of overlapping triangles can be exported to a file and then displayed and examined in ParaView.
Wind Tunnel
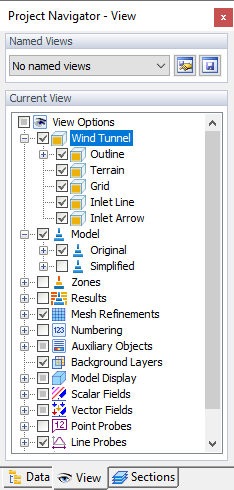
The outline of the wind tunnel is displayed as a box around the model in its center. You can check the wind direction, which is symbolized by a large red arrow. In the "Project Navigator", several options are available to display certain items relevant for the wind tunnel (see the image Project Navigator). The terrain level results from the value defined in the "Model Properties" section of the "General Data" window.
If necessary, you can adjust the size and position of the wind tunnel graphically or in the "Wind Tunnel" dialog box (see Chapter Wind Tunnel). Make sure that enough space is provided on all sides of the model for the air to flow unimpeded.
Openings
If you have closed openings or gaps in RFEM 6 or RSTAB 9 by means of the Shrink Wrapping types, you can check whether they are adequately closed in the RWIND 3 model. If necessary, you can modify the settings in the Edit Model dialog box of RWIND 3.
Original Model
The original model is a model created in RFEM 6/RSTAB 9, imported from an external file or created in the Model Editor in RWIND 3. The outer surface of the model (outer shell) is the most important part for external aerodynamics. Before calculation, the outer surface of the model is divided into triangles. The triangulation of the model surface is the basis for the creation of the simplified model using a shrink-wrapping mesh; the simplified model is the basis for the generation of the finite volume mesh in the space around the model. The numerical calculation is performed in this finite volume mesh. Although one of the great advantages of RWIND 3 is the possibility of using a simplified model (shrink-wrapping), which eliminates most of the potential problems, still every numerical calculation should be preceded by at least a quick check of the correctness of the geometry of the original model.
Before starting the simulation, we should check the geometry of the original model to ensure that it is not too complex for our purpose and that it does not contain unnecessary parts of the model (for example, inner surfaces, partitions, and so on) that are not important for our numerical simulation (external aerodynamics). Internal surfaces in a closed model (closed volume) increase the computational requirements in terms of both data and time, and can lead to inaccuracies. The more complex the geometry, the more time should be spent on checking the original model mesh and generated finite volume mesh. For this purpose, the Mesh Inspector tool is used.
Simplified Model
RWIND 3 features a "Simplified Model", which is created from the original RFEM 6 / RSTAB 9 model. It represents a special mesh to define the model boundary (see Chapter Computational Mesh and Model Simplification for further information).
You can display the simplified model as follows:
- Select the "Show Simplified Model" option in the panel.
- Select the "Simplified" option in the "View navigator" for the Model display.
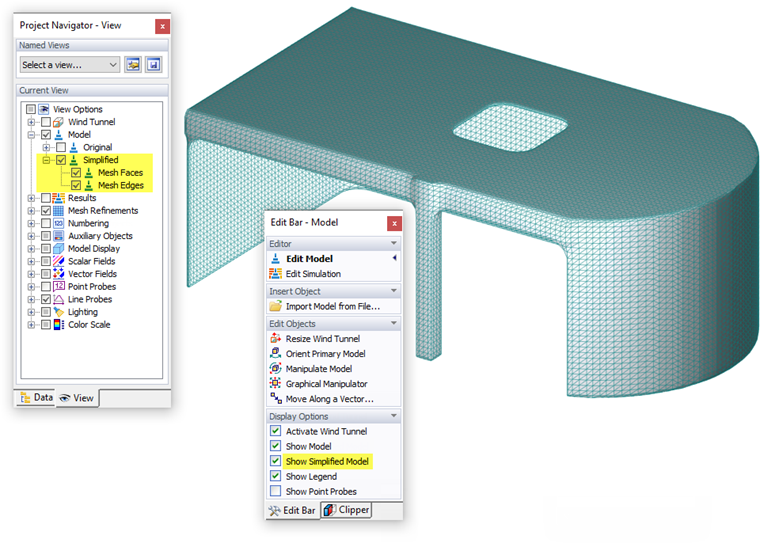
The degree of simplification is controlled by the "Level of detail" specified in the "Edit Model" dialog box. The chapter "General" includes an example that shows the effects of this value on the "shrink-wrapping" process applied to the model. If the boundaries are not represented properly, you can adjust the level. When you click
![]() in the
Edit Model
dialog box, you can immediately check the modifications and view the new simplified model. Note that a very detailed model will accordingly require more computational time.
in the
Edit Model
dialog box, you can immediately check the modifications and view the new simplified model. Note that a very detailed model will accordingly require more computational time.