21x
004192
0001-01-01
11 Program Functions

3.4.3 Project Navigator

Project Navigator

To the left of the work window, there is a navigator that looks like the Windows Explorer. To display or hide the Project Navigator, use the View → Navigator menu option or the corresponding toolbar button.

Image 3.8 Navigator button in the Default toolbar

The navigator shows the model data of opened files in a tree structure. Click [+] to open a branch of the tree or [-] to close it. You can also double-click the entry.

The navigator is similar to a toolbar: You can use the mouse to "grab" the navigator in its title bar and move it to the workspace. To dock it again, double-click the title bar or move the navigator to the window frame. When moving the navigator, directional buttons shown on the left appear that facilitate the docking to one of the four sides of the work window: Drag the navigator to the arrow button of your choice and release the left mouse button as soon as the pointer is placed on the button.

Shortcut menu of navigator

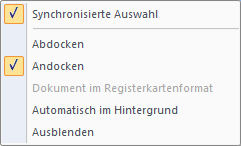
If you do not want the navigator to be docked to the window frame, clear the corresponding selection in the shortcut menu of the navigator.

If the Synchronized Selection is active, an object marked in the navigator is also highlighted in color in the model graphic.

The shortcut menu option Auto Hide allows you to minimize a docked navigator: As soon as you click into the work window, the navigator slides to the edge and becomes a thin bar (see Figure 3.9). You can also use the pin button on the top right of the navigator to select this function (see Figure 3.10).

The navigator opens in full size when you move the pointer across the Project Navigator field highlighted in the docked navigator bar.

Image 3.9 Navigator, tables, and panel in auto hide mode

At the bottom edge of the navigator, there are three tabs (four after the calculation). Use the tabs to switch between the Data, Display, Views, and Results navigators.

Image 3.10 Data and Display tabs in the project navigator
Data navigator

This navigator manages model and load data, as well as calculated results. Double-click an entry (a "leaf" of the tree structure) to open a dialog box for changing the selected object. When you right-click an entry, a shortcut menu appears with helpful functions used to create or modify the object.

Incorrectly defined objects are displayed in red, unused objects are displayed in blue.

Display navigator

This navigator controls the graphical display in the work window. When you clear an entry's check box, the corresponding object is hidden in the graphic.

Use the shortcut menu of the navigator shown on the left to save or import user-defined settings or use them as the default for new models.

Image 3.11 Views and Results tabs in the project navigator
Views navigator

This navigator manages user-defined views as well as user-defined and automatically created visibilities of objects (partial views, groups). Use the buttons to create user-defined views, set visibilities, integrate objects into user-defined visibilities, etc.

Working with views and visibilities is described in Chapter 9.9.1.

Results navigator

Use this navigator to control, which results are displayed in the graphic. Available entries depend on whether results of RFEM or of an add-on module are displayed.

Parent section