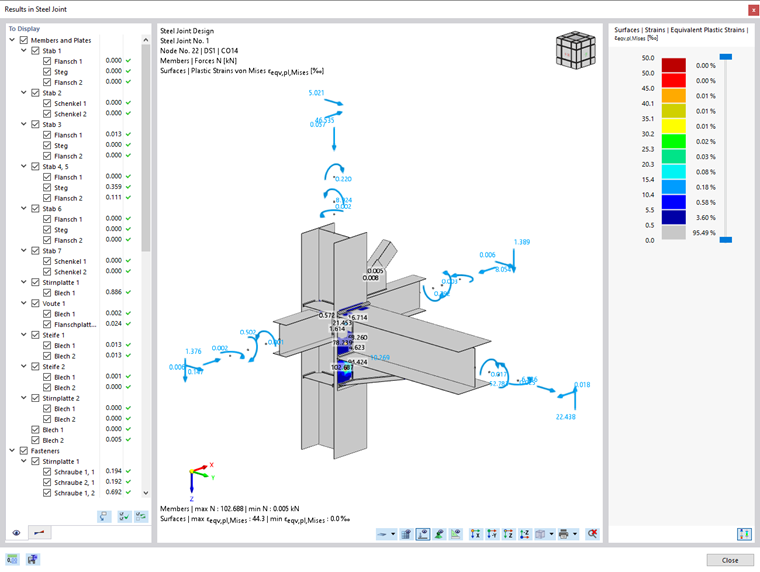
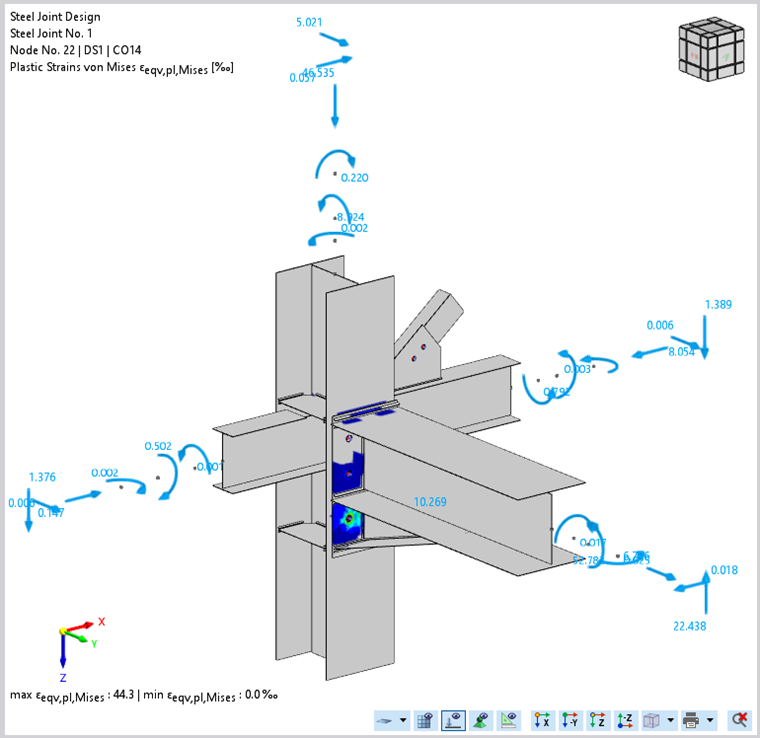
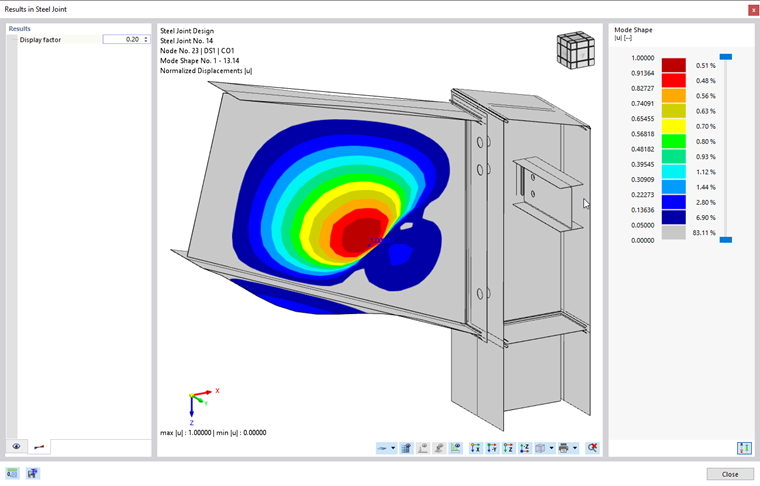
You can display the design results graphically in the model, as well as in a window that is specifically available for the add-on. Here you can specifically check the design of a node.
You can open the result window using one of the following options:
- Button
 in the toolbar of the result tables for "Steel Joint Design"
- Button
 in the toolbar of the
Design Check Details
dialog box
The "Results in Steel Joint" window shows the design checks applied to the result selected in the table.
In the central area, you can see the joint graphic. The navigator on the left consists of two tabs:
- To Display: You can select the components to be displayed in the graphic here.
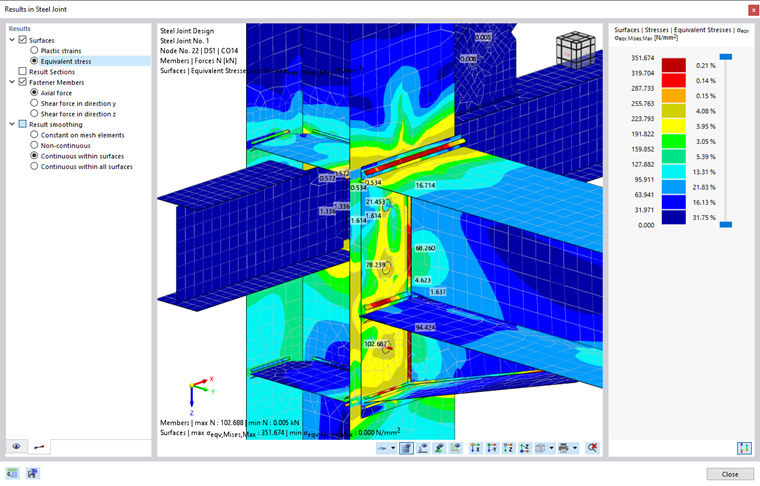
- Results: You can define the result type displayed on the selected components here.
To Display
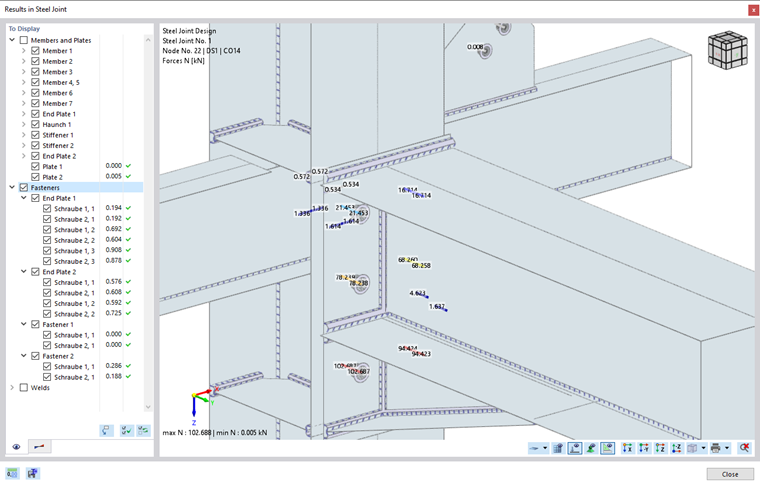
The Display tab lists all parts of the components in a tree structure, which are available at the selected node (auxiliary planes and auxiliary solids are not displayed). Use the check boxes to control which object components of the plates and members, fasteners, and welds should be displayed in the graphic. For example, if you want to check the results of the fasteners, deactivate the categories "Members and Plates" and "Welds".
The buttons below the component list facilitate the selection of the components. They have the following meaning:
| Button | Function |
|---|---|
|
|
Shows only the component of the governing result (selected in the table). |
|
|
Selects all components for the graphic |
|
|
Inverts the current selection |
Results
The Results tab controls the type of result displayed on the node.
Using the check boxes for surfaces, result sections, and fastener members, you can show or hide the result categories.
Surfaces
You can either display the plastic strains or the equivalent stresses on the surfaces and welds. The plastic strains provide the information about the yielding behavior of the individual components. The equivalent stresses are determined according to the von Mises hypothesis.
Result Sections
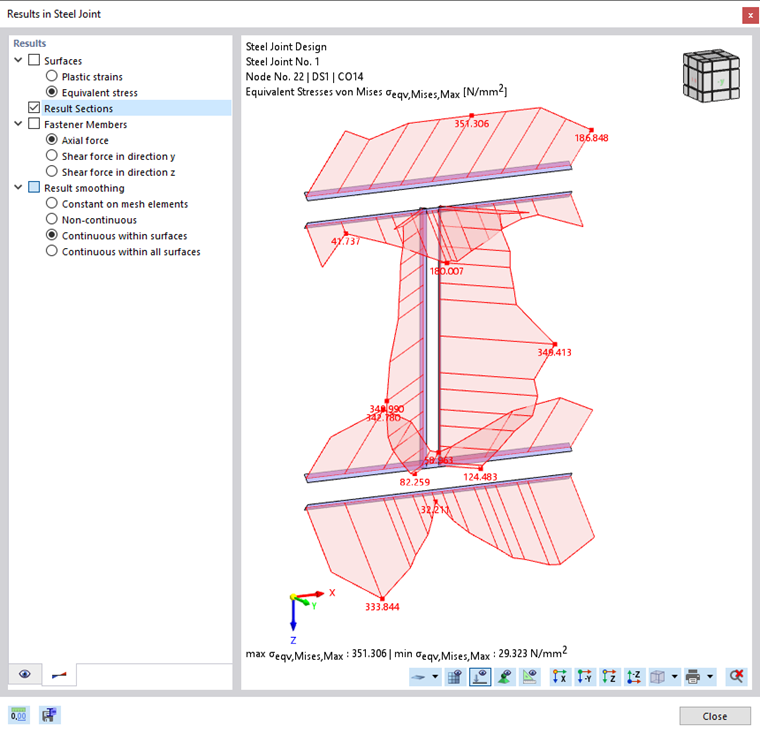
Use this check box to show and hide the results of welds. The "Plastic strains" or "Equivalent stress" selection box in the surface category controls which result type is displayed (see the image Equivalent Stresses of Result Sections for Welds).
The equivalent stresses of the welds are designed using the results in the result sections.
Fastener Members
Using the options of this category, you can specify whether to show the "axial force", the "shear force in direction y", or the "shear force in direction z" of the fasteners (see the image Show Axial Forces of Fasteners Only).
The following image shows the weld stresses of an end plate – without the results for surfaces and fasteners.
Result Smoothing
For surface results, you can specify whether to smooth the results of finite elements. For plastic strains, there is no smoothing by default ("Constant on Mesh Elements"), while for the equivalent stresses, there is surface-based smoothing ("Continuous in Surfaces").
The smoothing options are described using an example in Chapter Result Smoothing of the RFEM manual.
Graphic Area
In the central area of the window, you can see the connection node with the results of the components.
You can define the components and results to be displayed in the Display and Results navigators. To control the graphic, such as zooming or rotating, you can use all the mouse functions described in Chapter Graphic Control of the RFEM manual.
The buttons below the graphic have the following functions:
| Button | Function |
|---|---|
|
|
List button with the options to display the original or the deformed shape |
|
|
Shows or hides the FE mesh |
|
|
Shows or hides the forces and moments on a submodel |
|
|
Shows or hides the support reactions of the submodel |
|
|
Shows or hides the model in the background |
|
|
Shows the node in the X-view |
|
|
Shows the view of the node in the opposite direction of the Y-axis |
|
|
Shows the node in the Z-view |
|
|
List button with options for the axonometric, workspace-appropriate, or user-defined view |
|
|
List button with various options for printing the graphic |
|
|
Shows the full view of the joint |
The vectors of the forces and moments represent the internal forces that are applied to the substitute steel joint FE model in the design. The support reactions, in turn, provide information about the forces and moments at the supported ends of the members.
Use the list button option
![]() to display the deformed shape of the joint. This way, you can check whether the displacements and rotations are within acceptable limits. The deformation is set with the scaling factor 1.00 by default.
to display the deformed shape of the joint. This way, you can check whether the displacements and rotations are within acceptable limits. The deformation is set with the scaling factor 1.00 by default.
If a stability analysis has been carried out, the graphic shows the mode shape of the row selected in the Buckling Analysis table. In the "Results" tab, you can scale the buckling shape with a display factor.
Color Scale
The color scale with the value ranges of the strains (plastic strains) or equivalent stresses of the surface results is displayed on the right. It generally corresponds to the Colors tab of the RFEM control panel.
The colors are predefined. However, you can use the sliders at the top and bottom to reduce the color palette.
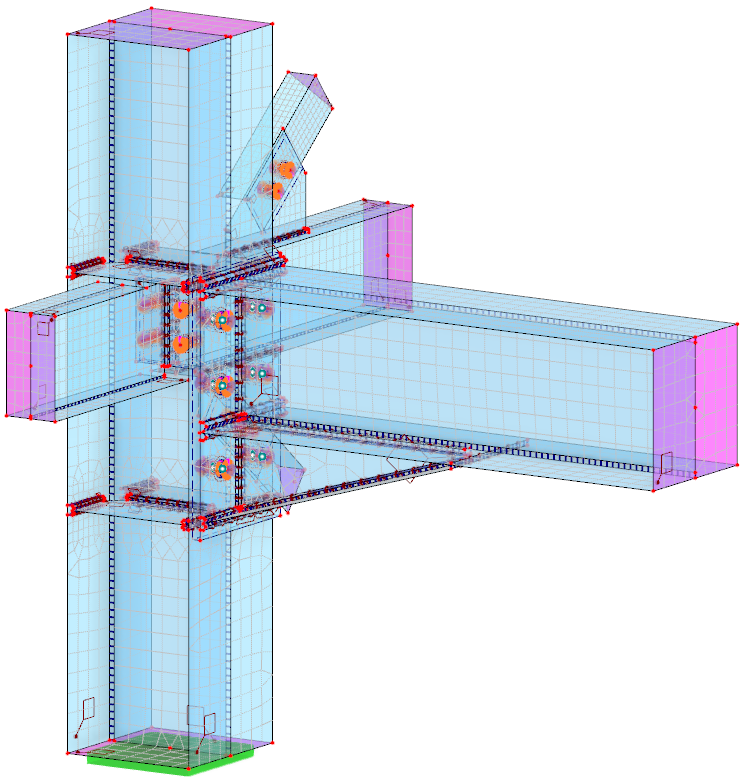
Steel Joint Model
At the bottom of the window is the button
![]() . It allows you to save the FE model of the steel joint as an RFEM file.
. It allows you to save the FE model of the steel joint as an RFEM file.
Specify the storage location in the "Save Copy" dialog box of Windows and modify the suggested file name, if necessary. Then, use the Save button to save the FE model of the joint node as a file. You can then open it with RFEM as usual.
In the file, you can check the modeling of the components and boundary conditions that apply to the substitute steel joint FE model. Furthermore, the loads on the nodes designed in the steel joint are stored in load cases. You can calculate them and evaluate the results as usual.

