Connections analyzed in the Steel Joints add-on use the substitute steel joint FE model (submodel) for design. This model is created according to a topological model of a steel joint. Individual design components, such as plates, welds, or bolts, are represented in this model by basic FE objects – surfaces or members – which are supplemented by special objects, such as surface contacts or rigid links. This approach makes it possible to compare the behavior of those basic elements with the analytical formulae provided by the design standards. By using that submodel, the resistance and buckling, as well as the stiffness and the deformation capacity of the steel joint, can be analyzed.
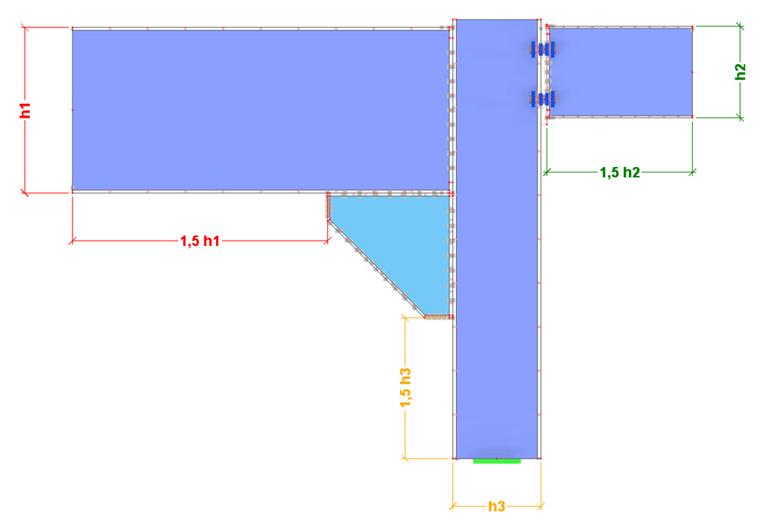
The dimensions of the submodel are determined proportionally to the section size of the joined members. Members modeled using 2D surfaces are extended axially by a multiple of the largest cross-section dimension beyond the connection components. This factor corresponds to 1.5 by default, but can be adjusted in the Ultimate Configuration. The furthest component of the joint serves as a reference for the distance.
In the submodel, the end of the connected member is either supported by a rigid support or loaded by a replacement load calculated in the global structure model, depending on the user settings. The loads at the ends of the members are based on the internal forces from the global model, taking into account the respective structural analysis settings, and are adjusted so that their effect corresponds to the internal forces on the relevant structural component in the joint to which the connection is assigned. The ends of the member are stiffened with a rigid plate to prevent warping of the cross-section and to avoid stress concentrations in the loaded or supported node.
By default, the FE model of the submodel uses a geometrically linear analysis together with a nonlinear material model to calculate the ultimate strength. The Newton-Raphson iterative method is applied to analyze the nonlinearities of the model. The non-linear second-order (P-Δ) analysis is used as the default setting for the structural analysis in the case of buckling assessment, while the linear Eigenvalue method is used for the stability analysis. For more information, see the Chapter Static Analysis Settings of the RFEM manual.
If second-order or large deformation analysis is considered in the structural analysis of the main model, this can lead to inconsistencies between the main model (equilibrium is established on the deformed structural system) and the submodel (forces are imposed on the undeformed submodel). For typical structural systems, however, this effect should be negligible.
Material Model
Surfaces representing member plates and inserted plates in the submodel have a uniform thickness with the assigned isotropic plastic material model. The stress failure hypothesis is based on the von Mises yield criterion. A bilinear diagram is used. The material is elastic until the yield strength is reached. The elastic modulus corresponds to steel; in the subsequent plastic phase, the plastic modulus corresponds to 1/1000 of the elastic modulus.
The criterion for determining the ultimate strength limit corresponds to 5% von Mises equivalent plastic strain. This value is recommended, but can be adjusted in the Ultimate Configuration. This allows you to use the plastic behavior of steel and the redistribution of the internal forces in the joint. It corresponds well with the real behavior of the steel joint.
Members and Plates
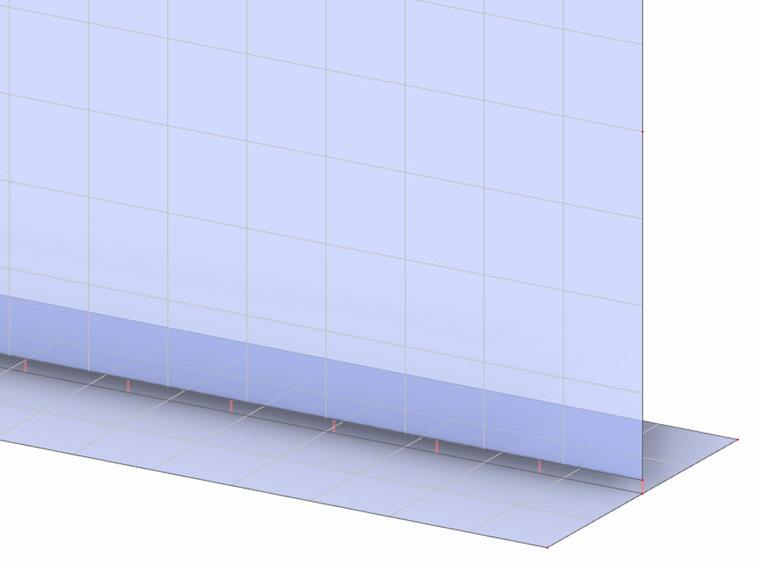
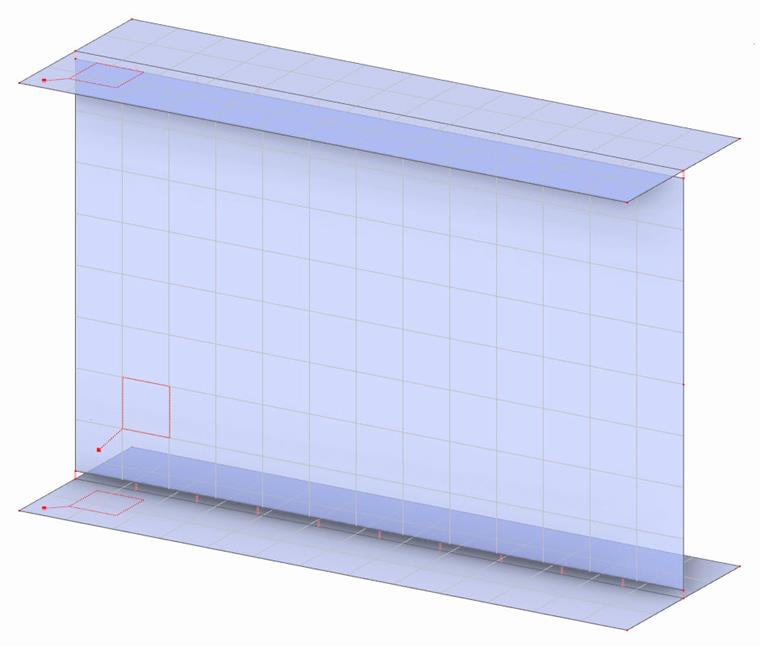
For modeling planar member plates and inserted plates, the "Plane" geometry type and the "Standard" stiffness type are used. The surfaces have a uniform thickness with an isotropic plastic material model assigned, which is described in the Material Model section. The surface is a 2D object that is located in the central plane of the plate. If the single plates, representing the member, cannot be connected directly using their boundary lines, a connection is created using Rigid Links. The "Line to line" rigid link type connects the boundary line of the connected member plate and the integrated line created in the member plate to which it is connected. This connection is used, for example, for I-sections.
Members or their parts from non-planar surfaces, such as circular hollow sections or rounded rectangular hollow sections, are modeled by segmenting the curved section into smaller planar surfaces. These surfaces have the same properties as surfaces used for planar plates. The level of segmentation can be adjusted in the Ultimate Configuration.
Mesh
The mesh settings for all surfaces have the shape of finite elements set to triangles and quadrangles with the applied option "Same squares where possible".
The member plates of each member have the same mesh element size. The minimum and maximum element sizes are set by default. The size of the mesh element is derived from the cross-sectional size of the member. By default, the longest edge of the cross-section is divided into eight parts. The mesh setting of inserted plates is handled separately: The size of the mesh element is derived from the longest edge of the sheet. For a plate without bolts, a default of eight elements is created on the longer edge; for a bolted plate, the default is 16 elements.
For bolts, a circular node mesh refinement is applied on surfaces for bolted plates only. For this circular node refinement, it is possible to set the radius as a multiple of the bolt hole radius, as well as to set the number of elements on the bolt hole edge.
For the substitute surface of the fillet weld, it is possible to specify the maximum number of elements along the length of the weld and the minimum and maximum sizes of elements.
Mesh nodes are linked to connected lines or surfaces by means of Rigid Links and Surface Contacts. This has an impact on the mesh of the connected surface so that its discretization is not completely independent.
Bolts
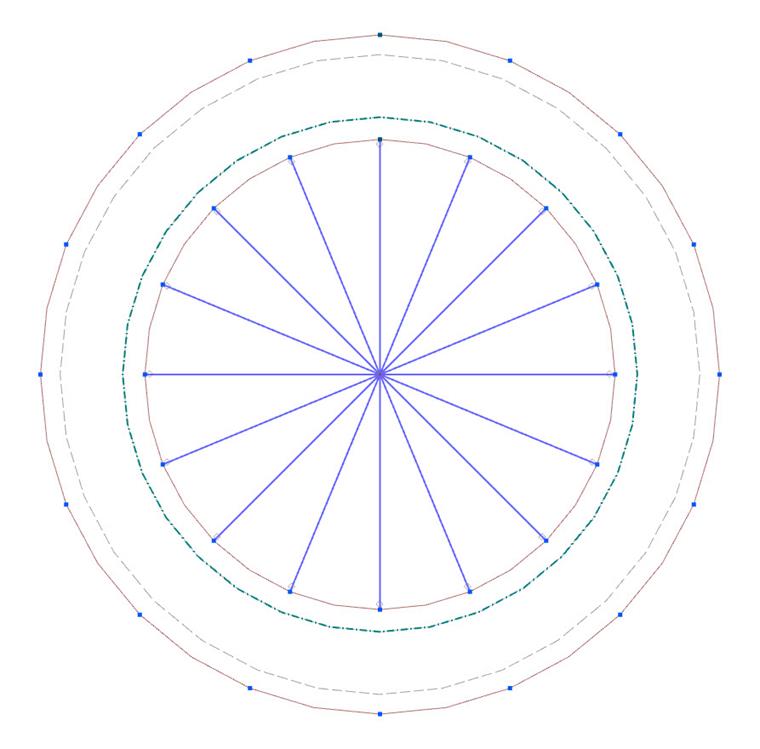
The bolt model consists of a system of members, surfaces, and surface contacts that represent the individual parts of the bolt, shank, head, and nut. A hole is prepared for each bolt in the bolted plates.
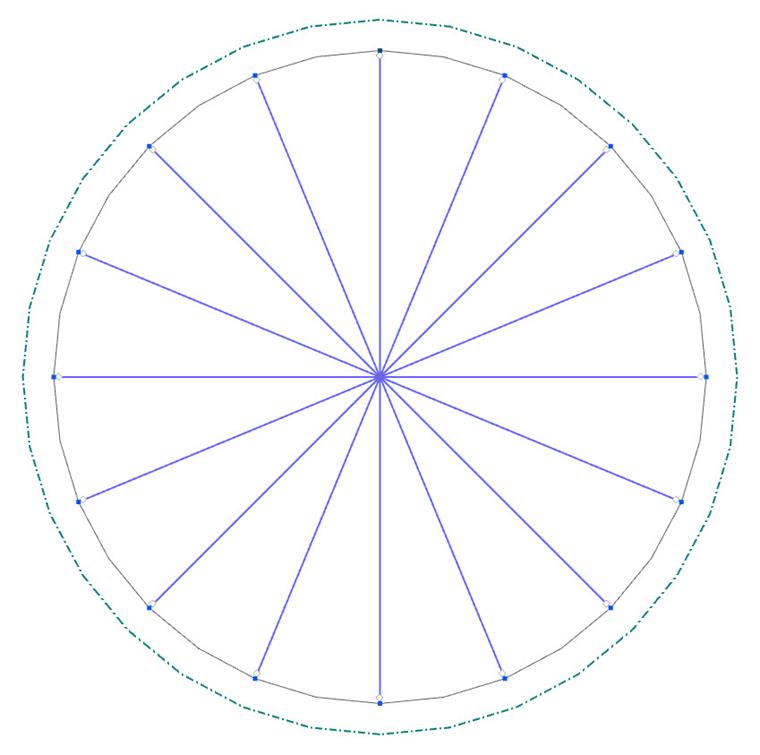
The hole in the plate is filled with radially arranged members called "spokes". These members, of the "Beam" type, are used to transfer shear between the bolt shank and the plate. The number of these members is affected by the mesh setting, corresponding to the number of elements on the hole edge. The section of these members is a "Massive Rectangle", and its dimensions are affected by the number of members and the dimensions of the bolted plates and correspond to the area of the bolt in bearing.
A member hinge is assigned to the node where the members are connected to the plate. The hinge is set so that the members do not reinforce the hole in the plate and transmit only the shear between the plate and the bolt.
The spoke members have a "Failure if tension" nonlinearity in order to allow only the compressed part of the bolt to act. An isotropic linear elastic material corresponding to the steel in the elastic state is assigned to them.
The model of the bolt head and nut also uses a set of radial members ("spokes"), as it is applied to the hole of the bolted plate. These members differ in cross-sectional dimensions, however, so that they represent the height of the bolt head or nut. Furthermore, neither hinges at the member ends nor any failure nonlinearity is assigned. That set of members is extended by a ring-shaped surface that connects to the radially arranged spokes. For the surface, the geometry type "Plane" and stiffness type "Standard" are used, with a uniform thickness that corresponds to the height of the bolt head or nut.
The centers of the radial system of members representing the bolt head, the bolt in the hole, and the bolt nut are joined by a member that represents the bolt shank and thread. The "Beam" member type is assigned to it, and it is referred to as shank. The shank member has a circular cross-section whose area corresponds to the threaded area of the bolt. The cross-section material is isotropic linear elastic.
The "Definable Stiffness" member type is used in the section between the bolted plates. The stiffness matrix corresponds to the member used between the bolt head (nut) and the bolted plate; the only difference is the bending stiffness, which is increased significantly. If the stiffness was not adjusted, there would be a physically unrealistic bending of the bolt at the point where the forces are actually transmitted exclusively by shear. The plastic behavior of this part of the bolt shank is represented by a member hinge of the "Diagram" nonlinearity type at the interface of the bolted plates.
The compressive forces arising in the contact of the bolted plates and between these plates and the bolt or nut head are transmitted by surface contacts. These are set between the surface of the bolt head ring and the surface representing the first bolted plate, between the individual bolted plates that are in contact, and between the surface representing the last bolted plate and the nut ring. The surface contact type is set as "Failure under tension" in the perpendicular direction to the surfaces and "Rigid friction" in contact parallel to the surfaces. Here, the friction coefficient is set to a value close to zero. These contacts allow the correct tensile force to be generated on the bolt shank.
The design tensile force and design shear force as a result of the internal shear forces in the y- and z-directions used for design checks arise on the shank between the bolted plates.
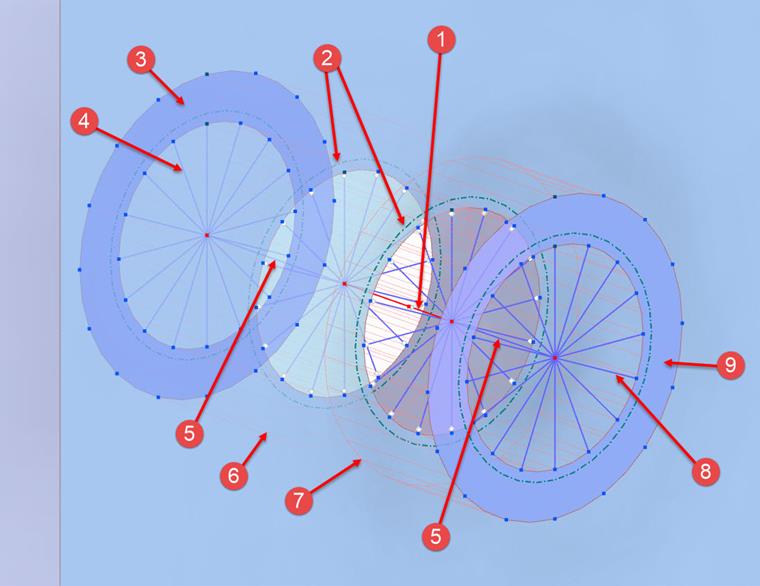
The numbers in the image above denote the following components:
| 1 | Bolt shank – member of the "Definable Stiffness" type |
| 2 | Bolt hole – spokes |
| 3 | Nut – surface ring |
| 4 | Nut – spokes |
| 5 | Bolt shank |
| 6 | Nut – surface contact |
| 7 | Bolt head – surface contact |
| 8 | Bolt head – spokes |
| 9 | Bolt head – surface ring |
Preloaded Bolts
The bolt prestressing is applied as part of a separate load case in the submodel. This Preloaded bolt load case is then considered as the initial state for the actual design load case. According to the preloading force factor, which is specified in the Ultimate Configuration (and is 0.7 by default according to EN 1993-1-8), the prestress is applied to the bolt shaft as a member load depending on the tensile strength.
Welds
The model of fully penetrated butt welds uses a direct connection between the welded plates. It is represented by Rigid Links of the "Line to line" type. The connection is similar to the connection between member plates. This type of rigid link uses the "User-defined distribution" and "Ignore relative position" options.
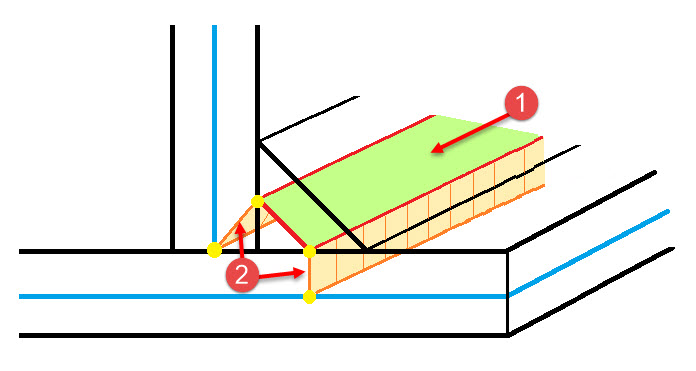
The model of fillet welds uses a system of rigid links, too (see ➁ in the graphic below), with substitute surfaces (see ➀ in the graphic below) for the connection.
The rigid link type is "Line to line", with the "User-defined distribution" and "Ignore relative position" options applied, joining the edge of the connecting plate to the edge of the substitute weld surface, and the second edge of the substitute surface to the reference plate. The substitute surface is located at one-half the height of the triangle cross-section of the fillet weld. This height is known as the "throat thickness" of the fillet weld. The substitute surface of the fillet weld has the "Standard" stiffness type and a uniform thickness with the dimensions that correspond to the throat thickness of the weld. The orthotropic plastic material model is applied.
The weld material model is set so that it corresponds to the welding behavior taken into account in the standards. This means that only stresses corresponding to the welding stress components σ⊥, τ⊥ and τ|| occur on the equivalent surface. In the other stress directions, the stiffness of the equivalent surface is close to zero.
Buckling Analysis
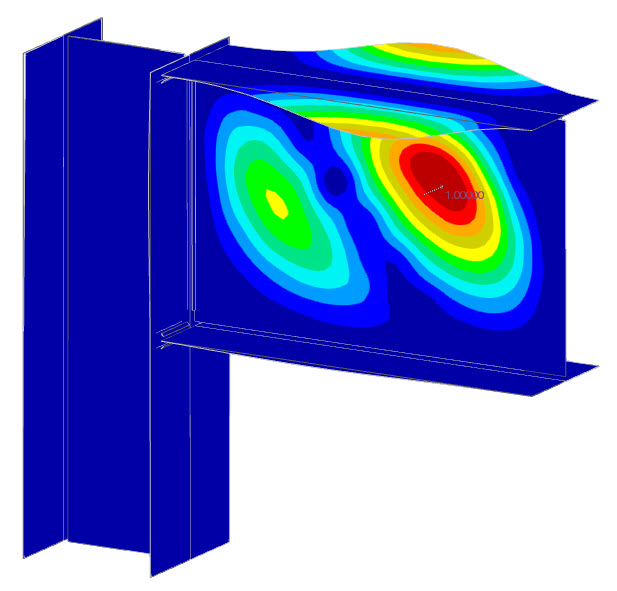
The Substitute Steel Joint FE Model approach is also well-suited to evaluate the steel plate buckling using an FE analysis of the shell model. For this purpose, the model used for the static analysis is adapted in a certain way so that the Substitute Steel Joint Buckling FE Model (Buckling Submodel) is finally applied.
The modified settings of the buckling submodel are as follows:
- All materials used are set to elastic (member and plate material, all parts of the bolt model, weld substitute surface).
- The model is loaded at the ends by Imposed Nodal Deformations instead of the forces from the global structure model. These deformations are equivalent to nodal loads, but their use will ensure that the free member ends do not affect the results of the stability analysis negatively.
- By default, the buckling submodel uses the "Second-order (P-Δ)" analysis type for the static analysis and the "Eigenvalue method (linear)" with four lowest eigenvalues for the stability analysis.
After the calculation, the model provides the required number of eigenvalues with each critical load factor. It is up to the user to evaluate whether the stability of the steel joint is sufficient.
Stiffness Analysis
To determine the stiffness of the joint, two submodels are used. These are the main Substitute Steel Joint Stiffness FE Model (Stiffness Submodel) – a detailed shell model that is, except for the loading and supports, identical to the submodel used for the static analysis –, and the Substitute Steel Joint Auxiliary Stiffness FE Model (Auxiliary Stiffness Submodel) that is used to refine the joint stiffness results considering the effect of deformations of the connected members.
The design parameters of the stiffness submodel are managed in the "Stiffness Analysis Configuration". This setting enables you to select the "Analysis type" (geometrically linear or second-order P-Δ) and to define the "Maximum number of iterations" and "Number of load increments". You can also control the model size and mesh settings, similarly to the settings of the "Ultimate Configuration" applicable for the stress-strain analysis of the connection. Further model parameters are also taken from the ultimate configuration.
The loads on both submodels (stiffness submodel and auxiliary stiffness submodel) correspond to the joint stiffness under investigation. The stiffness is analyzed separately for each member in the joint. The analyzed member is loaded at the end with a unit force corresponding to the type and direction of the investigated stiffness S (SN+, SN-, SMy+, SMy-, SMz+, SMz-). The other members in the connection have rigid supports at their ends. The value of the unit load to determine the "Initial stiffness" depends on the dimension of each connected member.
Once the calculation has been performed, the stiffness submodel is used to obtain the deformation (rotation or displacement) at the end of each analyzed member. The deformation obtained from the auxiliary stiffness submodel is subtracted from this deformation to consider the stiffness of the attached members. The result is the stiffness of the joint calculated from the load and deformation. Based on this stiffness, the connections can be classified as "Pinned", "Semi-rigid", or "Rigid".
