


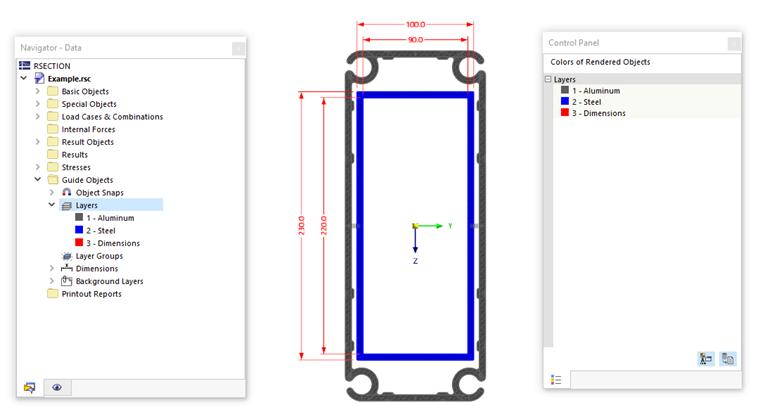
Layers allow you to structure objects according to specific criteria for the display. They are comparable to the functions of CAD programs for showing and hiding individual layers in the drawing. The objects that can be managed in layers include not only model objects such as points, elements, or parts, but also guide objects such as dimensionings.
Each layer can be assigned specific display properties via the color and the line design. Layers can also be locked so that objects are not accidentally moved or deleted.
Layer Manager
The layers are managed in the Layer Manager. There, you can create new layers, switch the visibilities for layers on and off, or lock the editing of a layer.
Use one of the following options to open the Layer Manager:
- In the Navigator - Data, double-click an entry in the Guide Objects → Layers category.
- Activate the
 button in the toolbar.
 - Use the View → Layer Manager menu.
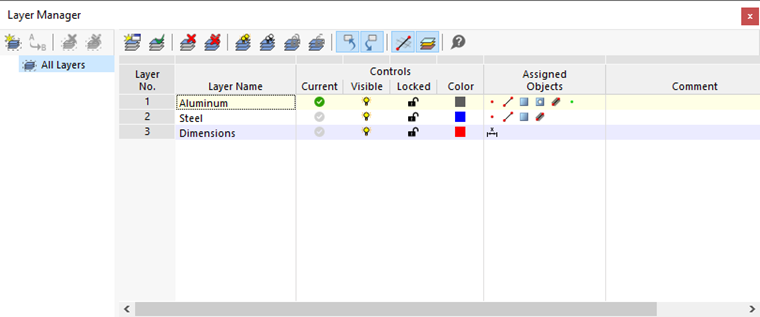
In the Navigator, only the 'All Layers' entry is normally available. If you have created layer groups, these are also displayed. The subentries allow you to handle the layers specifically: The table only lists the layers of the selected layer group.
Table
The table provides not only a compilation of all layers but also control options for the display. The individual columns mean:
| Column | Content and options |
|---|---|
| Layer No. | Number of the layer |
| Layer Name | User-defined layer designation |
| Current | Working layer for placing new objects |
| Visible | Control option for displaying the objects of layers |
| Locked | Control option for editing the objects of layers |
| Color | Coloring for objects of layers |
| Assigned Objects | Object types of the layer in symbol representation (points, elements, dimensionings, etc.) |
| Comment | User-defined note |
Buttons
The buttons in the toolbar of the Layer Manager are assigned the following functions:
| Button | Function |
|---|---|

|
Creates a new layer group (see the layer groups chapter) |

|
Allows you to rename the selected layer group |

|
Deletes the selected layer group |

|
Deletes all layer groups |

|
Creates a new layer |

|
Sets the selected entry as the current layer (alternative: click in the 'Current' column) |

|
Deletes the selected layer |

|
Deletes all layer groups |

|
Activates the visibility for all layers |

|
Hides all layers |

|
Locks all layers (objects cannot be edited) |

|
Unlocks all layers |

|
Allows you to display the objects marked in the table as a selection in the graphic |

|
Allows you to display the objects selected in the graphic highlighted in the table |

|
Displays the invisible objects transparently or not at all |

|
Displays the objects in the colors of the layers (see the Rendering section) |
Assigning Objects to a Layer
To manage objects in layers, you can proceed as follows:
- In the Layer Manager, use the
button to create one or more layers.
- Enter suitable designations and check the preset parameters such as color or line display.
- In the work window, select the objects you want to assign to a layer.
- In the toolbar, select the relevant layer in the list.
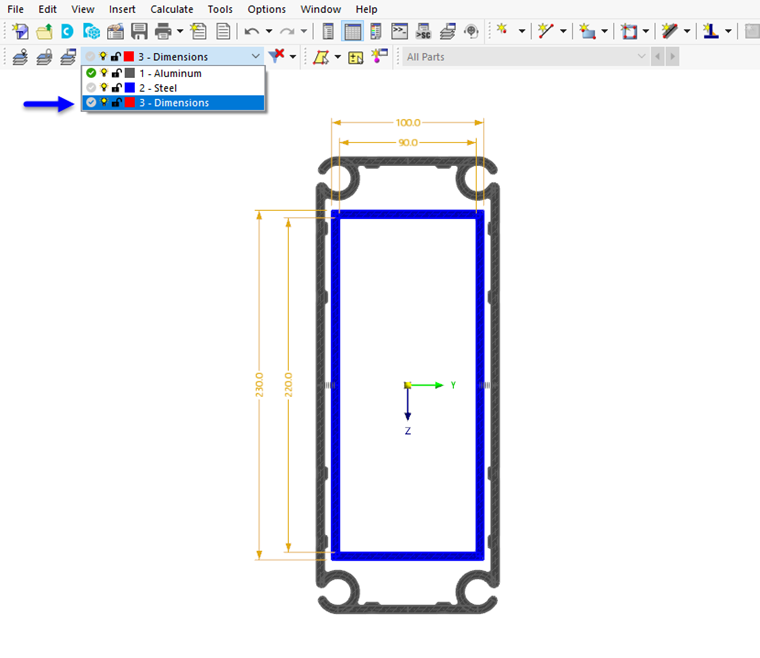
The assigned objects are indicated in the Layer Manager with symbols for points, elements, parts, etc. (see the Layer Manager image).
New objects are always assigned to the current layer. This layer is marked in the Layer Manager with the
 symbol.
Toolbar
In the toolbar of the work window, you have several setting options for the layers.

The field shows the current layer. In the list, you can select a different layer and set it as current. The change is synchronized with the Layer Manager: This layer receives the
symbol.
As described above, you can select objects and assign them to a specific layer via the list. The symbols before the layer designation indicate whether the current layer is visible or locked.
The buttons have the following functions:
| Button | Function |
|---|---|

|
Shows or hides the selected layer |

|
Locks or unlocks the selected layer |

|
Jumps to the row of the selected layer in the Layer Manager for adjustments |
Rendering
Each layer is automatically assigned a color. However, you can also adjust the colors:
- In the table of the Layer Manager, double-click a color.
- In the Choose Layer Color dialog, define the suitable color.
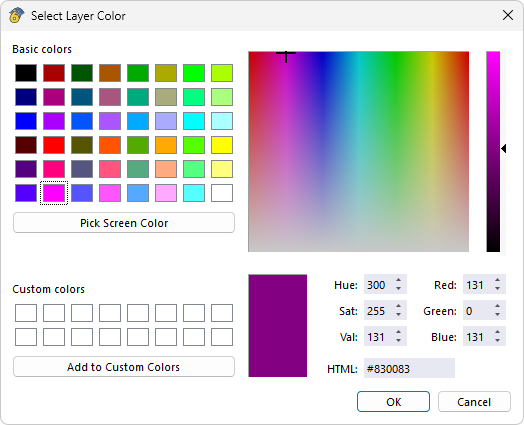
In order for the objects to be displayed in the layer colors, a corresponding setting for the display is required. These colors can be activated with two options:
- Layer Manager button
in the toolbar for object display in material or layer color
- Navigator - Display: Category Colors of rendered objects according to → Layer
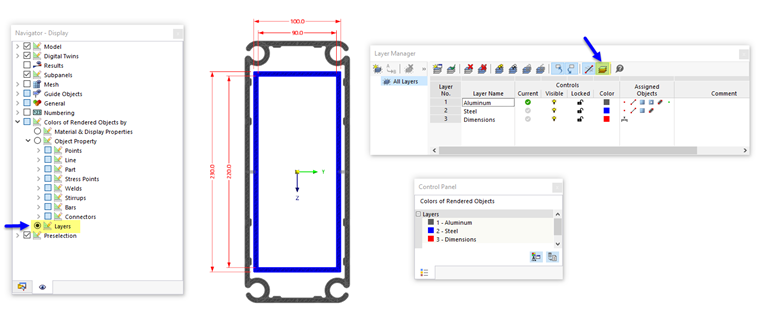
In the control panel, you can check the colors assigned to the objects in each visible layer.