


Select the model, load, or guide objects that you want to move or copy. Then, click the
![]() button (see the image
Modeling Tools
). In the "Move/Copy" dialog box, specify whether the objects are to be moved or copied, and define the parameters.
button (see the image
Modeling Tools
). In the "Move/Copy" dialog box, specify whether the objects are to be moved or copied, and define the parameters.
Main
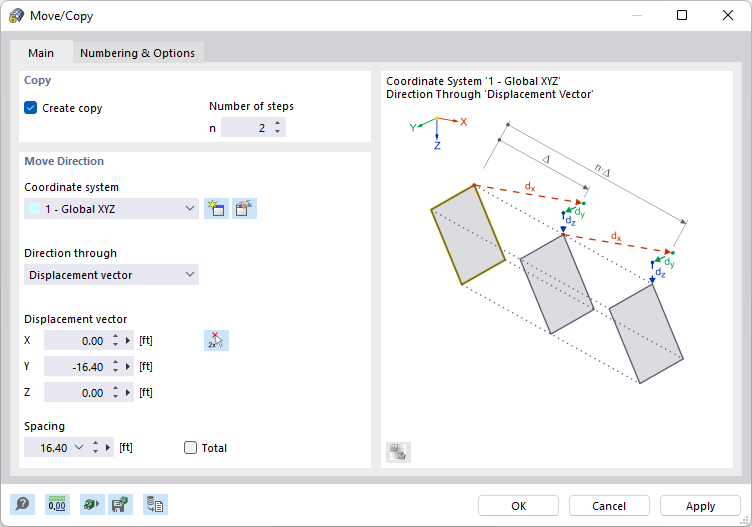
The Main tab manages the basic parameters for moving or copying objects.
Copy
If the "Create copy" check box is not ticked, the selected objects will be moved. If you want to create one or more copies, tick the check box. Then, enter the "Number of steps" that describes the quantity of copies.
Move Direction
Define the "Coordinate system" in which the objects are to be moved or copied. You can select a User-Defined Coordinate System from the list or create a new one using the
![]() button.
button.
The "Direction through" list provides two options for defining the distance of the moved or copied objects:
- Displacement vector: The objects are moved or copied by a vector in the specified coordinate system.
- Parallel to axis: The objects are moved or copied parallel to an axis of the specified coordinate system.
Enter the "Displacement vector" by the directions in X, Y, and Z (or U, V, and W for a user-defined coordinate system). Using the
![]() button, you can define the vector graphically by clicking two points or nodes. If you move or copy objects parallel to an axis, select the "Axis" in the list.
button, you can define the vector graphically by clicking two points or nodes. If you move or copy objects parallel to an axis, select the "Axis" in the list.
The "Spacing" text box shows the distance between the objects. You can adjust the displacement vector here, too. When creating several copies, the "Total" check box controls whether the spacing is applied between the individual copies or between the original and the last copy.
Numbering & Options
The Numbering and Options tab is only displayed when copying. Here, you can influence the numbering of new objects and make useful settings for copying.
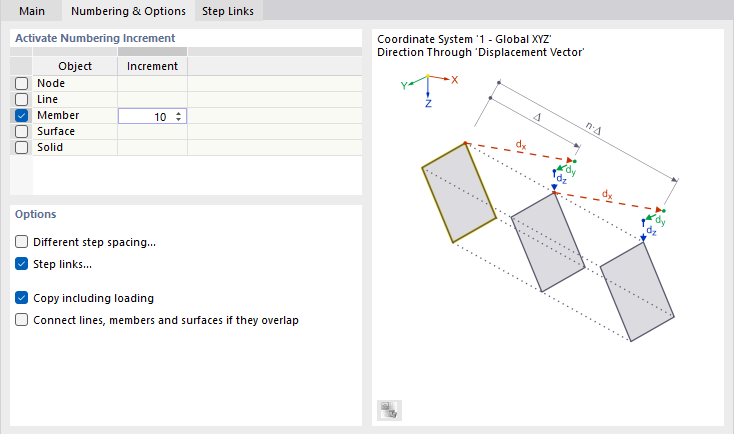
Activate Numbering Increment
If none of the check boxes in this dialog section is activated, RFEM automatically numbers the new objects consecutively. To force a user-defined numbering, tick the corresponding "Object" box. In the "Increment" table column, you can then specify the value by which the numbers of the copied elements are increased. For example, if you copy member 3 and member 7 twice by an increment of "10", as shown in the image above, you get members nos. 13 and 17, as well as nos. 23 and 27.
Options
If more than one copy is specified, RFEM creates the copies at regular distances. Tick the "Different step spacing" check box if you want to create the copies at irregular distances. Then, you can define them in the Step Spacings tab.
Select the "Step links" check box if you want to create members or surfaces between the original and the copy. Then, you can specify them in the Step Links tab.
If you have selected model objects, you can also "Copy including loading". Then, the loads of all load cases are copied, not only those of the current load case.
The "Connect lines, members and surfaces if they overlap" check box controls whether the lines of the copies are connected to existing objects or treated as separate objects.
Step Spacings
The Step Spacings tab is displayed if at least two copies are specified and the "Different step spacing" check box in the Numbering and Options tab is selected.
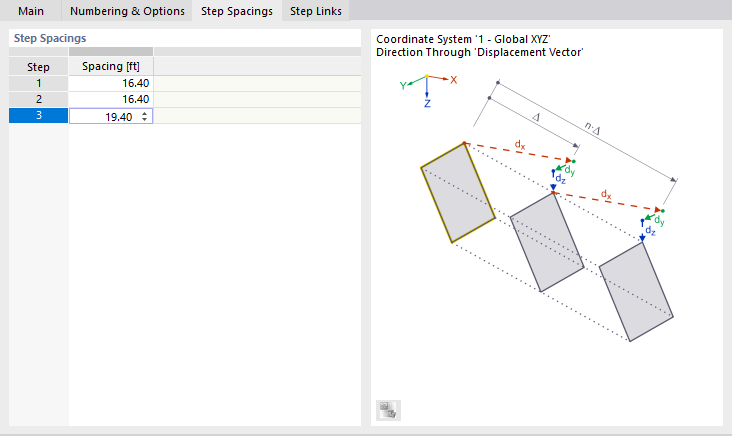
In the table, you can individually define the "Spacing" between the individual copies.
Step Links
The Step Links tab is displayed if the "Step links" check box in the Numbering & Options tab is selected.
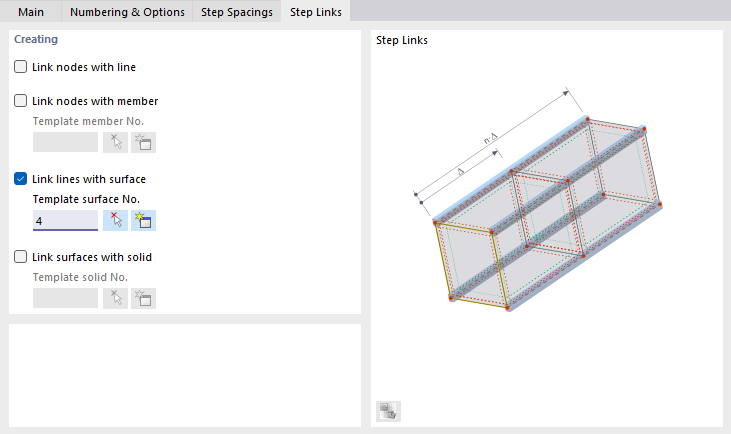
Use the check boxes to define whether the nodes of the original and the nodes of the copy are to be connected to each other with a "line" or with a "member". Furthermore, it is possible to create a "surface" or a "solid" between the lines or surfaces of the originals and their copies (see the dialog graphic).
Enter a template object or select it graphically with the
![]() button to apply its properties to the connection objects.
button to apply its properties to the connection objects.