This chapter describes how to print graphics of several windows and how to use selected views for a mass print.
Multi-Window Printing
When using several windows for your model display, you can also document the window areas on one page. Activate the More option in the "Graphic Printout" dialog box, which is available in this case under the "Window to Print" item (1).
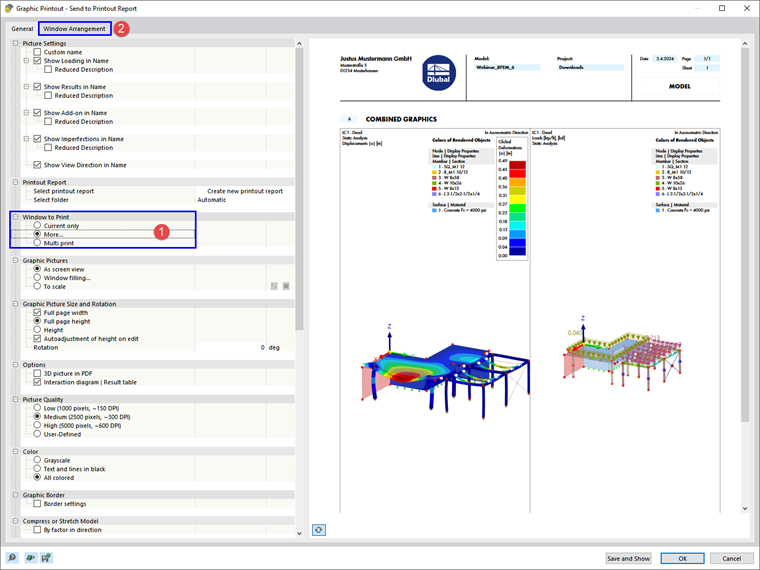
Switch to the Window Arrangement tab (2).
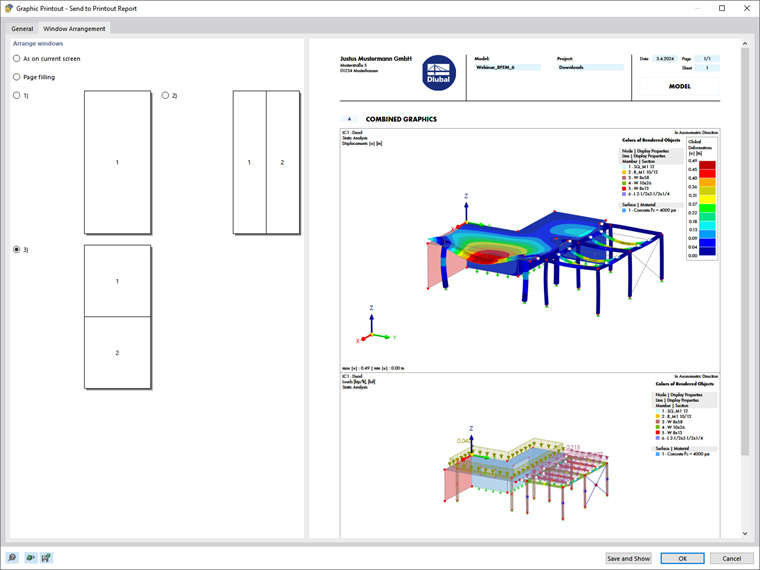
You can specify how the windows are arranged on the sheet:
- As on current screen: The windows are arranged on the page as they are represented in the work window. If they are next to each other in the work window, the images will be taller than they are wide when printed in portrait format.
- Page filling: Each window is printed on one page.
- 1): Only the first window (on the left or at the top of the work window) is printed.
- 2): The windows are arranged next to each other.
- 3): The windows are arranged one below the other.
Multi-Print
You can use the current view for a mass print in order to generate graphics for loads, internal forces, and deformations. To do so, select the Multi-print check box in the Graphic Printout dialog box (1).
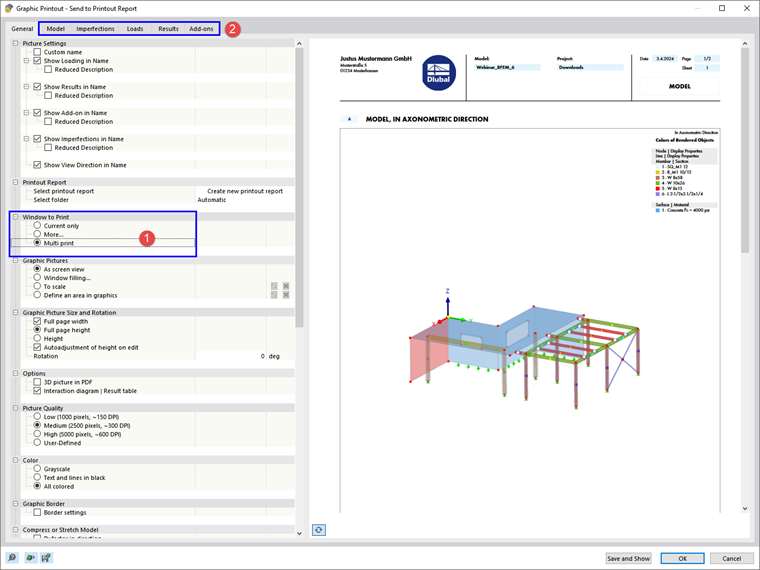
Further tabs are added to the dialog box (2). Define which graphics of the model, imperfections, loads, and results are to be created automatically (2).
Model
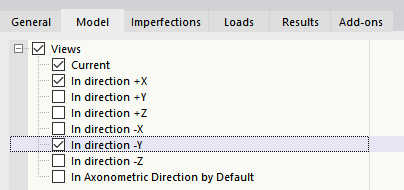
In addition to the current view, seven standard views are available in the "Model" tab. Activate the "Views" check box if you want to select one or more of these views for the printout.
Imperfections
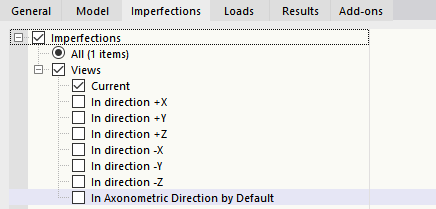
Select the "Imperfections" check box if you want the views of the imperfection cases to be printed as a multi-print. If you have created several imperfection cases, but you want to print only selected cases, activate the "Select" option. You can then define the imperfection cases in a new dialog box (for a description, see the section Loads).
In addition to the current view, seven standard views are available for the graphics of imperfections.
Loads
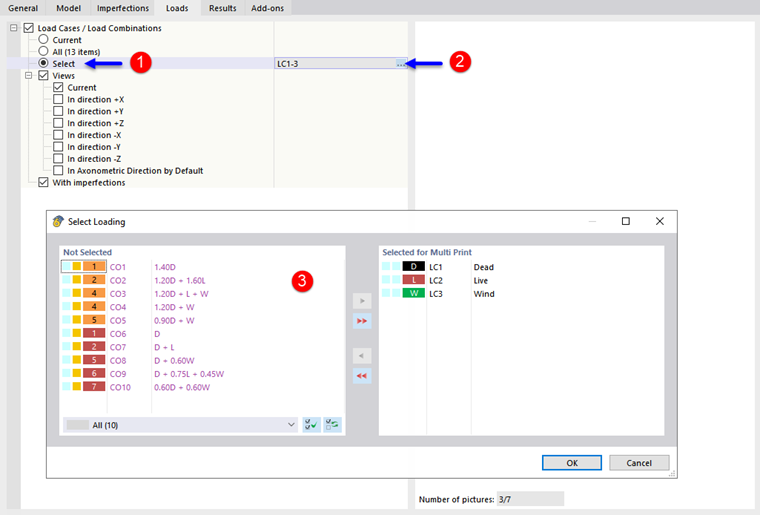
Select the "Load Cases / Load Combinations" check box if you want the load images of the load cases and load combinations as a multi-print.
If you only want to print specific load cases, activate the "Select" check box (1). Click in the input text box to the right with the load case numbers so that the
![]() button appears (2). Click the button to open the "Select Loading" dialog box. There you can define the load cases and load combinations for multi-printing as described in the chapter
Printout Report Manager
(3).
button appears (2). Click the button to open the "Select Loading" dialog box. There you can define the load cases and load combinations for multi-printing as described in the chapter
Printout Report Manager
(3).
In addition to the current view, seven standard views are available for the graphics of loads.
The "With imperfections" check box controls whether imperfections are shown in the load images.
Results
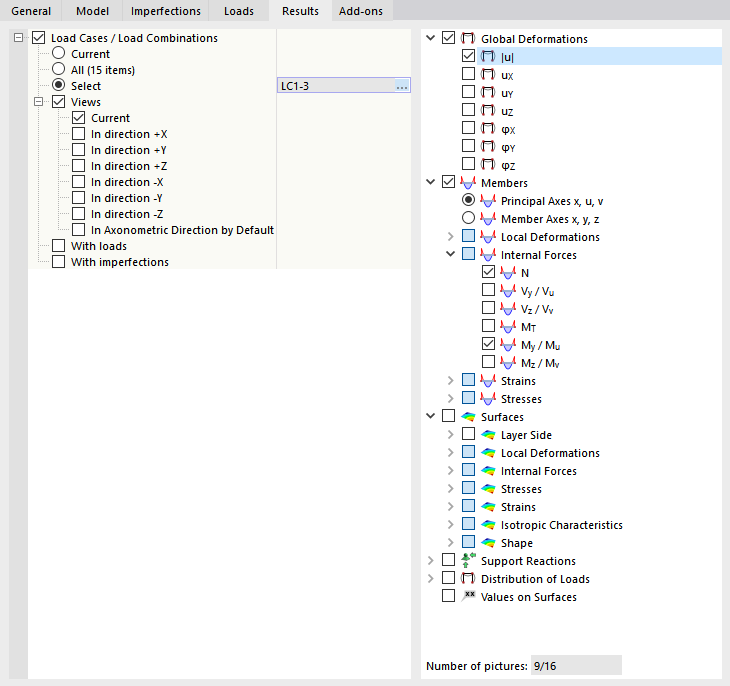
Select the "Load Cases / Load Combinations" check box for the results of the load cases and load combinations as a multi print. If you want to print the results of specific loads, activate the "Select" check box. You can then define the load cases or combinations in a new dialog box (for a description, refer to the section Loads).
Define the results that you want to print as graphics in the directory tree on the right. If you select a check box, the corresponding image is prepared for the selected load cases and combinations in the activated views.
In addition to the current view, seven standard views are available for the graphics of results.
The "With loads" and "With imperfections" check boxes control whether the load images and imperfections are shown in the result graphics.
In the "General" tab, you can check the preview of the multi-print.