


The Printout Report Manager manages the printout reports, including any elements. Open the dialog box using one of the following options:
- Printout report menu Edit Printout Report on Edit
- Button
 in the printout report toolbar
- Shortcut menu of an entry in "Printout Report Navigator"
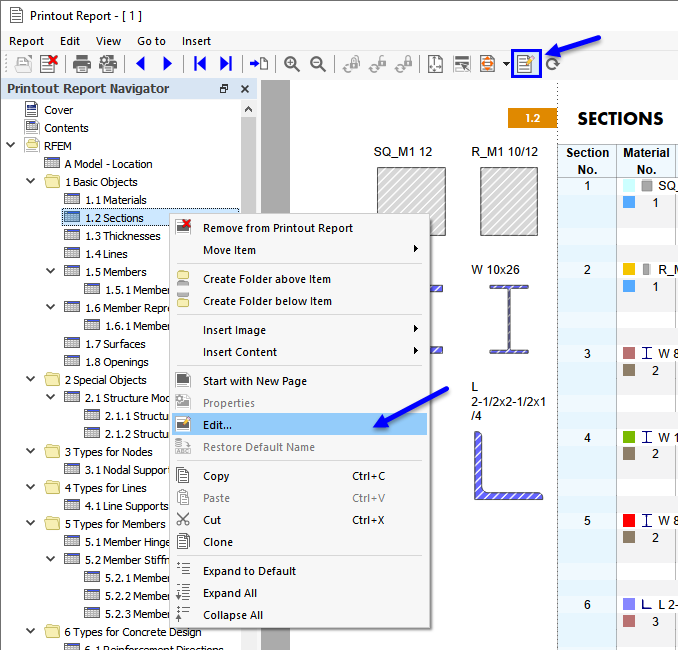
The "Printout Report Manager" dialog box appears with a list of all printout reports and a chapter directory tree.
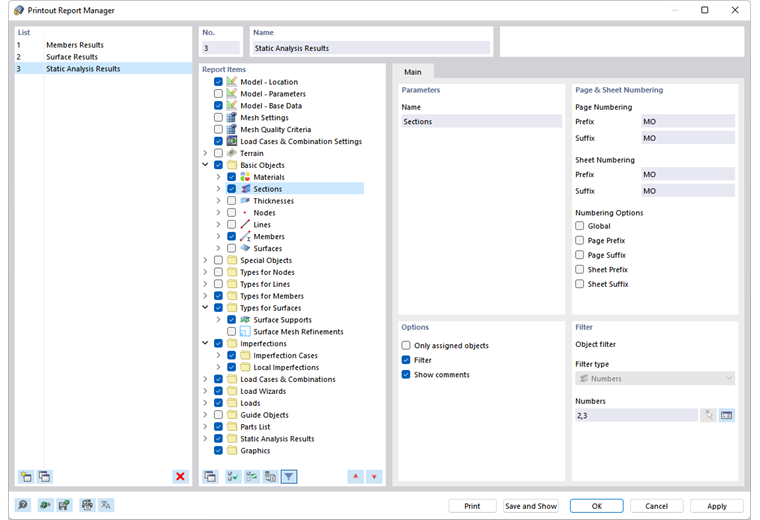
List
In the list, select the printout report whose content you want to adjust. In the "Report Items" dialog section, you can define the elements of the document in detail.
When working with several printout reports, we recommend entering a description for each printout report in the "Name" dialog section. This way, you can easily distinguish your documents.
To create a new printout report, use the buttons
![]() or
or
![]() at the end of the list.
at the end of the list.
You can import the report elements from a template or save the current selection as a template. The functions are described in the chapter Printout Report Templates.
Report Items
The chapters of the printout report are listed in a directory tree. They basically correspond to the entries in the "Navigator – Data". If you select a check box, the corresponding chapter is added to the document.
Some chapters include subcategories that you can activate individually for the printout. For example, if you select the "Section Values" option under "Sections" (see the image above), RFEM inserts a subchapter with cross-section properties into the printout report.
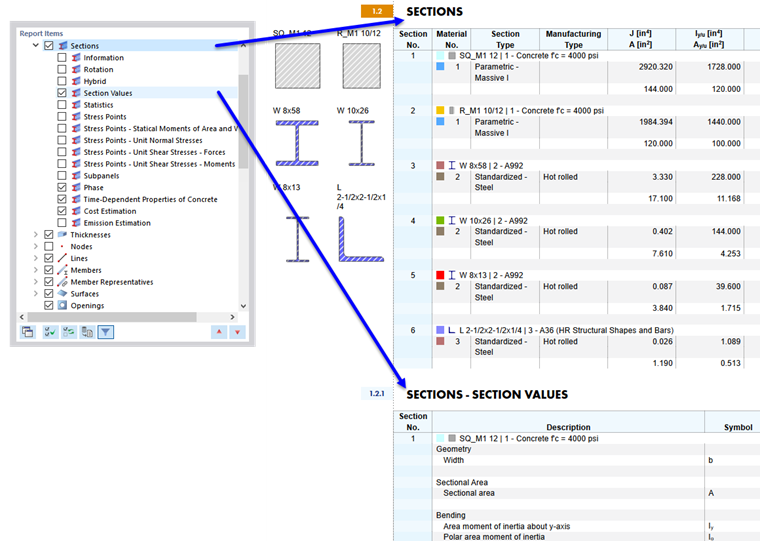
In the "Graphics" folder, you will find all the images you have printed in the directory (see the image Selecting Printout Report Folder ).
Use the
![]() button at the bottom of the "Report Items" dialog section to activate the elements of a default report.
button at the bottom of the "Report Items" dialog section to activate the elements of a default report.
Main
In the Main tab, you can enter specific settings for the chapter you selected in the "Report Items" navigator. The available options are aligned with the chapter.
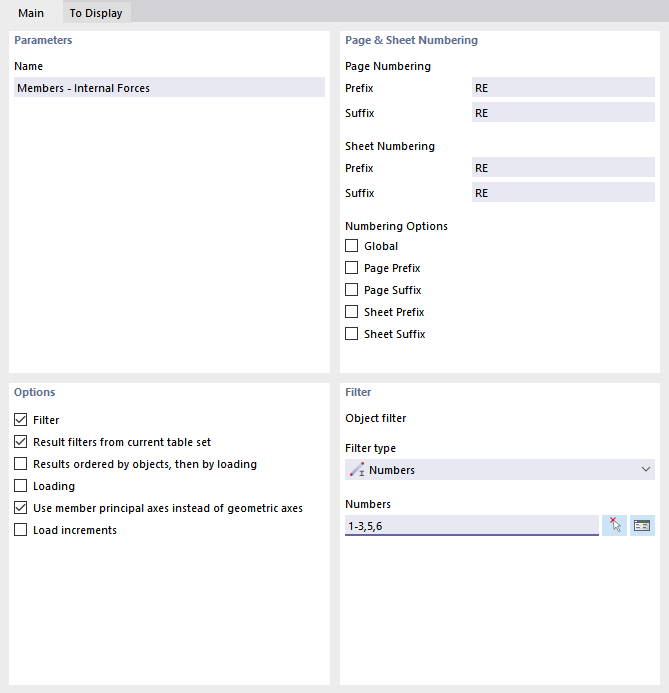
Parameters
The "Name" of the chapter corresponds to the description in the "Report Items" navigator. If you change the description, the modified name is used as the chapter title in the document.
Page & Sheet Numbering
The pages are numbered consecutively by default and managed as a whole under one "Sheet". You can add a prefixed or suffixed abbreviation to the "Page Numbering" and "Sheet Numbering". The following abbreviations are preset for "Prefix" and "Suffix":
- MO: model data
- IM: imperfections
- LO: load data
- RE: results
If you want to use other descriptions, select the corresponding category and enter the abbreviation. For reasons of space, we recommend choosing abbreviations that do not have more than two letters.
Use the check boxes for "Numbering Options" to control which abbreviation is displayed for page or sheet numbers.
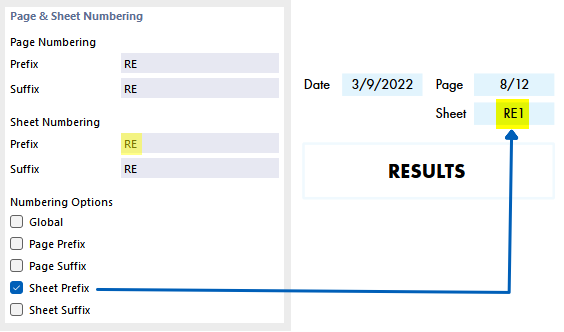
The "Global" check box applies the abbreviation of the current category to the entire printout report.
Options
The check boxes available in this dialog section are aligned with the corresponding printout report category. The "Main" Tab image shows the options for member results.
Only assigned objects
The check box controls whether the document includes all defined objects and object types, or only those that are actually used in the model.
Filter
Tick the check box if you want to include only certain objects in the documentation. Then, you can define these objects in the Filter dialog section.
Result filters from current table set
Usually, RFEM uses the same parameters for results as for the tables. If you clear the check box which is active by default, you can prepare the result rows and columns for the printout in the To Display tab according to user-defined criteria that are independent of the filter criteria for tables (see the Result Table Manager ).
Results ordered by objects, then by loading
By default, results are listed by load cases, combinations, and design situations. If you select the check box, the data are printed in the order of the individual object numbers – for example, the results of Load Cases 1 to 5 for Member 1 is followed by the results of these load cases for Member 2, and so on.
Loading
Select the check box if you want to include only certain load cases, design situations, or combinations in the documentation. Then, you can define the loading in the Load Cases/Combinations tab.
Use member principal axes instead of main axes
Normally, member results are displayed in relation to the principal axes. If you use asymmetrical cross-sections and you want the output to be related to the input axes y and z, clear the check box.
The image Member Axes y/z and Principal Axes u/v shows the axis systems of a member with an asymmetrical cross-section.
Load increments
Select this option if you have defined Load Increments and you want the results of the individual steps to be included in the documentation.
Filter
This dialog section is displayed if the "Filter" check box in the "Options" dialog section is selected. Define the objects whose properties or results are relevant for your documentation. First, define the criterion in the "Filter type" list by which you want to filter the objects.
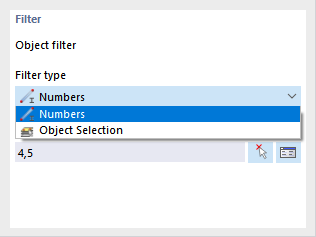
Then, enter the "Numbers" of the objects in the field below, or select the relevant object selection in the list. When filtering by numbers, you can define the objects graphically in the model using the
![]() button. The
button. The
![]() button allows you to select the objects in a list.
button allows you to select the objects in a list.
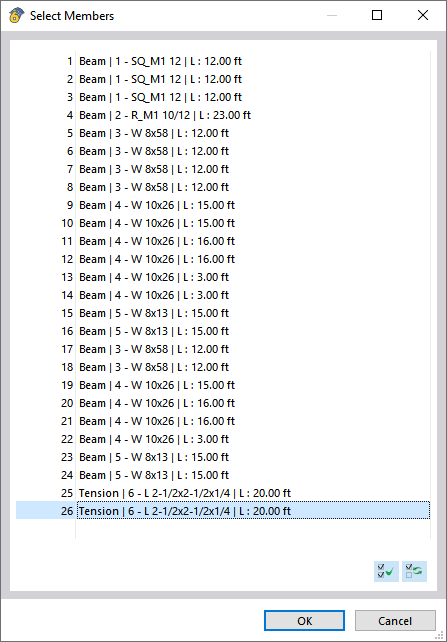
To select several entries in the list, hold down the Ctrl key while clicking.
Load Cases / Combinations
The Load Cases/Combinations tab is available if you have ticked the "Loading" check box in the "Options" dialog section for any result category. Select the load cases, design situations, and combinations whose results you want to be included in the printout report.
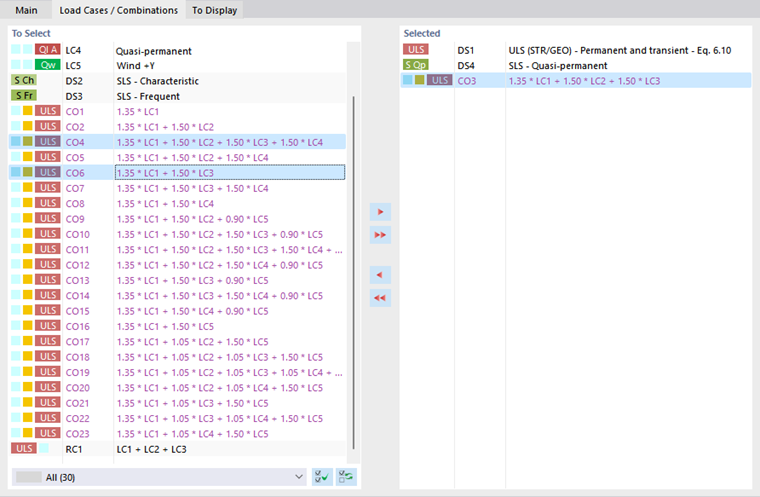
The "To Select" column lists all load cases, design situations, and combinations you have created. To transfer an entry to the "Selected" list, use the following options:
- Double-click the entry.
- Select the load case or combination. Several entries can be selected by holding down the Ctrl key. Then, click the
 button.
If the selected loads have been calculated successfully, only these results are displayed in the selected result category.
To Display
The entries in the To Display tab are accessible if you have deactivated the "Result filters from current table set" check box in the "Options" dialog section for any result category.
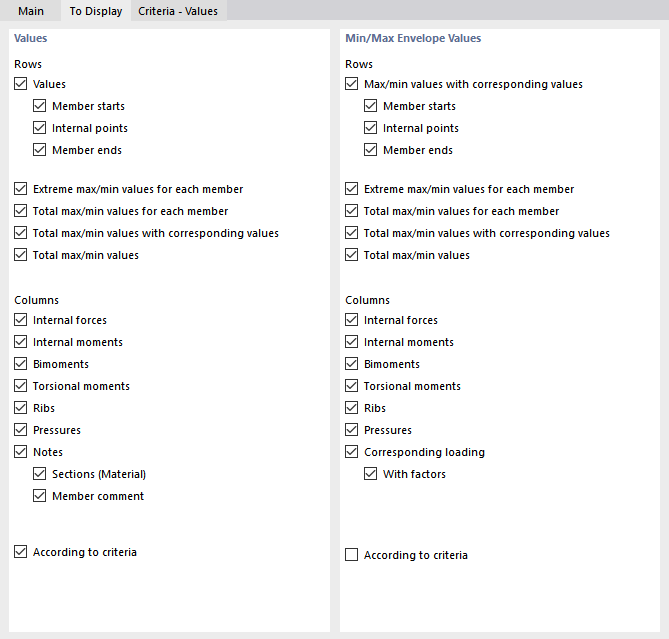
In the "Values" and "Min/Max Envelope Values" dialog sections, you can control the output of results for load cases and combinations or design situations in detail. The corresponding table rows and columns are accordingly shown or hidden in the document.
The "According to criteria" check box allows you to display certain result values in the printout report. You can define the results output criteria in separate tabs (see the section Criteria).
Criteria – Values | Criteria – Min/Max Envelope Values
The Criteria – Values and Criteria – Min/Max Envelope Values tabs are available if you have ticked the "According to criteria" check boxes for the values and result envelopes in the "To Display" tab. Describe the user-defined conditions that the results of load cases and combinations or design situations must fulfill in order to appear in the printout report.
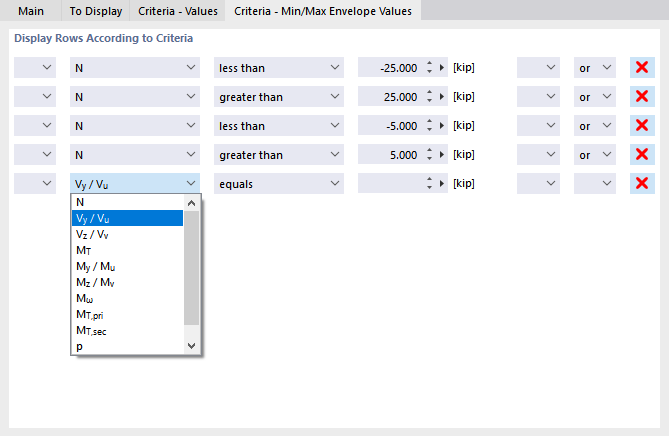
Select the result type in the second column. In the next two columns, you specify the criterion that is to be applied. The following conditions are available for selection:
- Equals
- Does not equal
- Greater than
- Greater than or equal to
- Less than
- Less than or equal to
To define another criterion, select the "or" entry (each criterion counts for itself) or "and" (each criterion must be fulfilled) in the last column. Then, define the next condition in the new line.
Buttons
The buttons in the lower left and right corners of the "Printout Report Manager" dialog box have the following functions:
|
|
Open the Printout Report Templates dialog box for importing a template |
|
|
Open the Printout Report Templates dialog box for saving current selection as a template |
|
|
Open the Printer & Page Settings dialog box for setting up the printer |
|
|
Open the Select Language dialog box for setting the language |
| Send the selected printout report to a printer | |
| Save and Show | Close the dialog box and create a preview of the selected printout report |
| OK | Exit the dialog box without showing the printout report |
| Cancel | Close the dialog box without saving changes |
| Apply | Save changes without closing the dialog box or showing the printout report |