General Settings
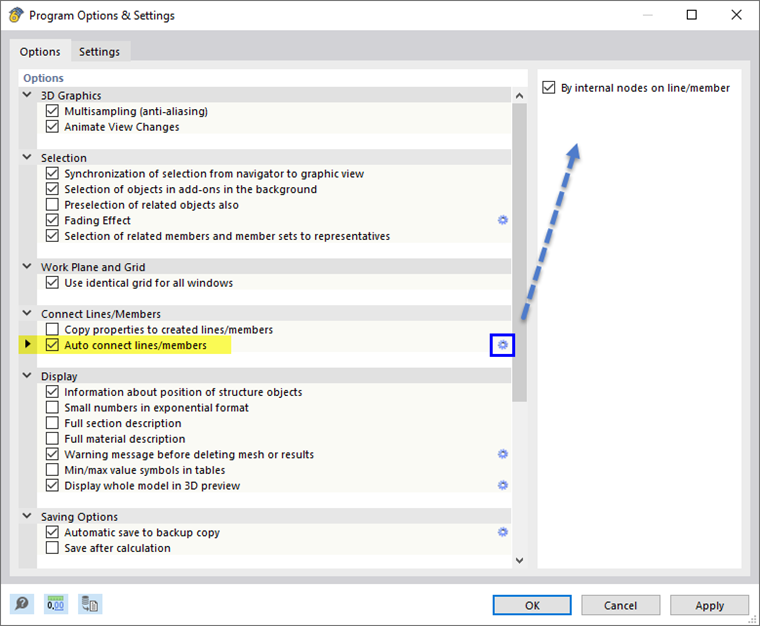
Lines and members are automatically connected by default as soon as they cross each other when placed. The corresponding setting can be found in the "Program Options & Settings" dialog box, which you can call up in the Options menu or with the
![]() button. The connection is set up by internal nodes of the
On Line/Member
type. This way, lines and members are kept.
button. The connection is set up by internal nodes of the
On Line/Member
type. This way, lines and members are kept.
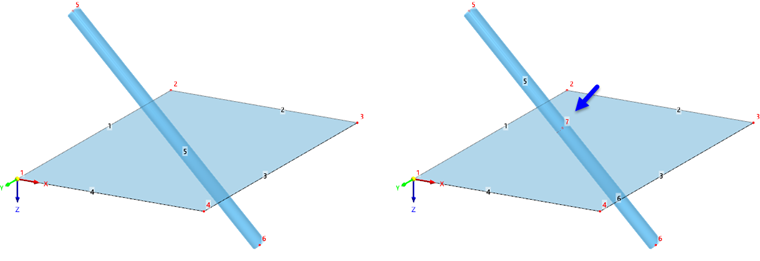
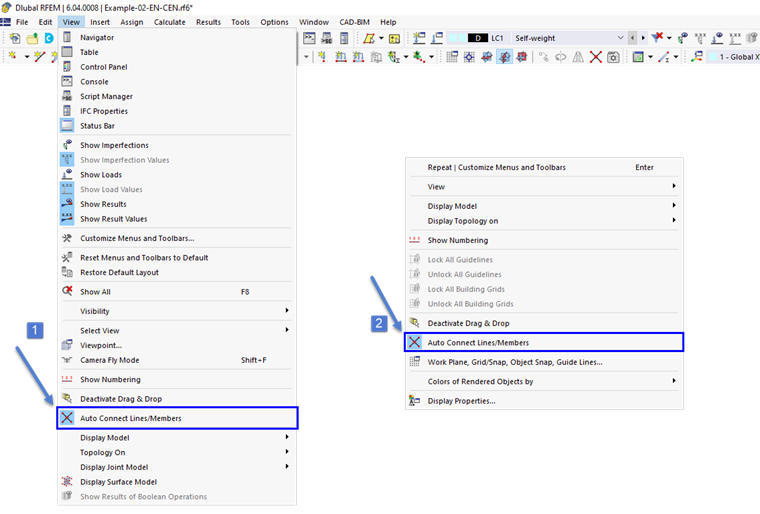
You can also use the View menu or the general shortcut menu to control whether lines and members being placed are to be divided or connected at the common node.
Function "Connect"
To connect crossing lines or members subsequently, use the Connect function in the Tools menu or the
![]() button in the toolbar.
button in the toolbar.
You can also connect lines or members without selecting them beforehand. Go into the work window and draw a window across the zone where you want to connect the lines or members. It is not necessary to capture the objects completely. This way, you can create, for example, the intersection point of a member with a surface.