You can move, copy, or later modify any graphic that you have printed in the printout report.
Moving a Graphic
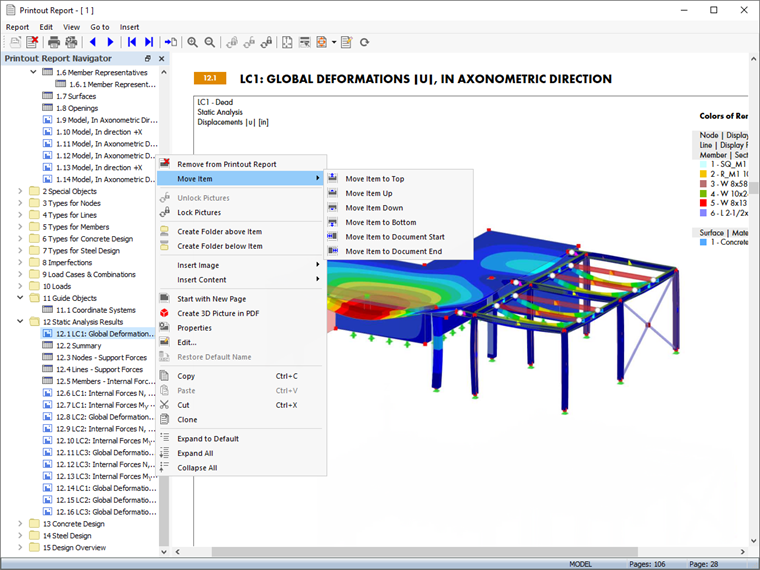
To change the position of a graphic, drag and drop the entry in the Navigator to the appropriate location. Alternatively, use the shortcut menu of the Navigator entry.
Copying or Cloning a Graphic
In the shortcut menu of the graphic (Navigator entry or image), two options are available for creating a copy.

- Copy: The graphic is copied to the clipboard. You can then insert the copy at another location using the 'Paste' function in the shortcut menu or the Ctrl+V keyboard shortcut.
- Clone: The copy of the graphic is inserted directly after the original.
Adjusting Graphic Properties
If you want to rename a graphic or change the layout, adjust the 'Properties' of the image. This function is available in the shortcut menu of the graphic and the Navigator entry.
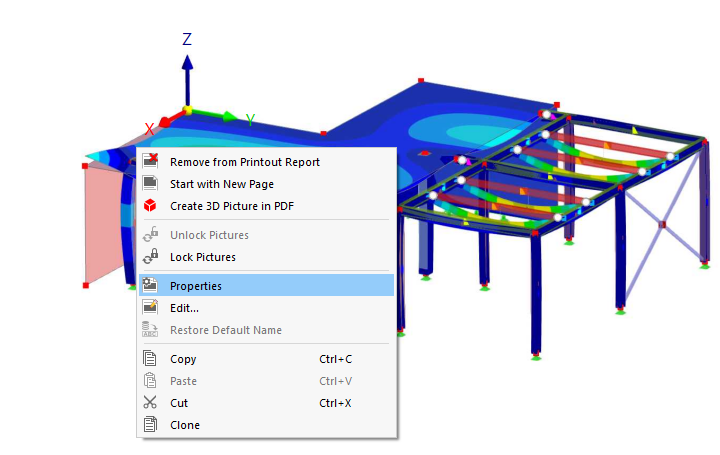
The 'Image Properties' dialog box appears with the general parameters for the graphic layout. They are shown in the Graphic Printout image. Make the changes there.
Modifying a Graphic
If you want to change the viewing angle of a graphic or adjust the objects, loads, or results displayed in the image, you do not need to print the graphic again. Use the 'Edit' entry in the shortcut menu of the Navigator or the graphic (see image above) to open the Edit Printout Report Image dialog box.
In the RFEM work window, you can not only adjust the print area, but also define a different section or object selection, as well as change the load case or result type. Once you have adjusted the view, confirm the changes with OK.
Locking a Graphic
Each graphic is saved as a dynamic image. This means the graphic is automatically updated when changes are made to the model or to the results. If performance problems occur in the report due to the graphics, you can prevent the dynamic adjustment by using the Lock Images shortcut menu option or the
 button in the toolbar.
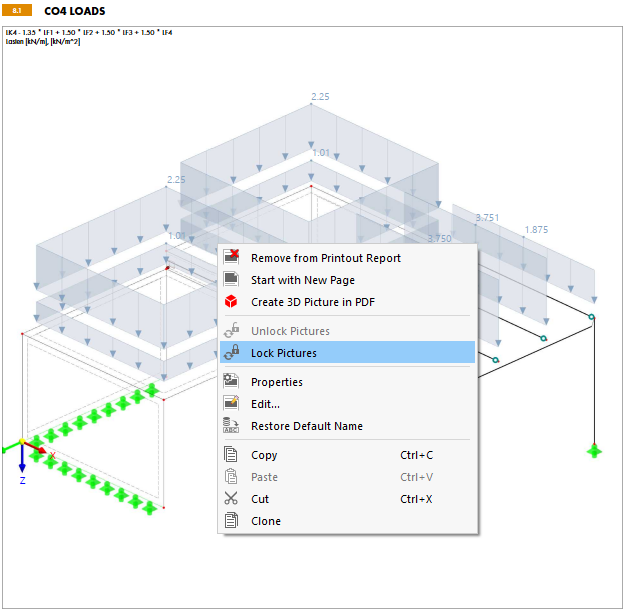
The lock on a graphic can be removed again via its shortcut menu. It is then treated dynamically again and, if necessary, regenerated.
You can lock all graphics at once with the
button, and remove the lock with the
 button. This way, you do not need to select the graphics individually.
If you use locked images when editing the printout report, you can update all graphics at the end with the
 button.
Adjusting a Multi-Print
You can subsequently replace, delete, or add to the images stored in a Multi-Print. To do this, use the Edit Multi-Print function in the Edit menu of the printout report. Alternatively, use the
 button in the toolbar.
The 'Edit Multi-Prints' dialog box appears. Select the relevant multi-print; the assigned graphics are selected in the Navigator.
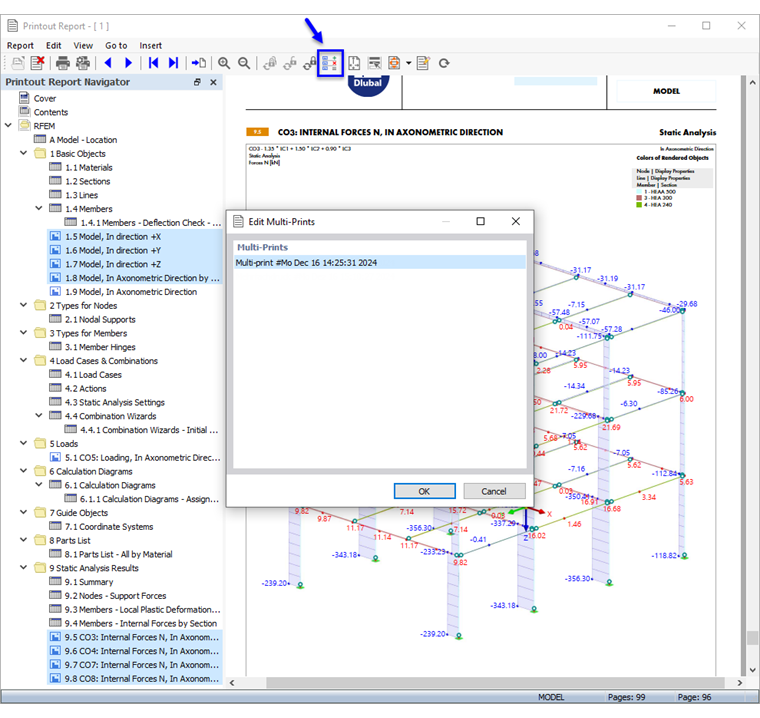
Click OK to open the 'Edit Multi-Print' dialog box. There, you can revise the selection of graphics.
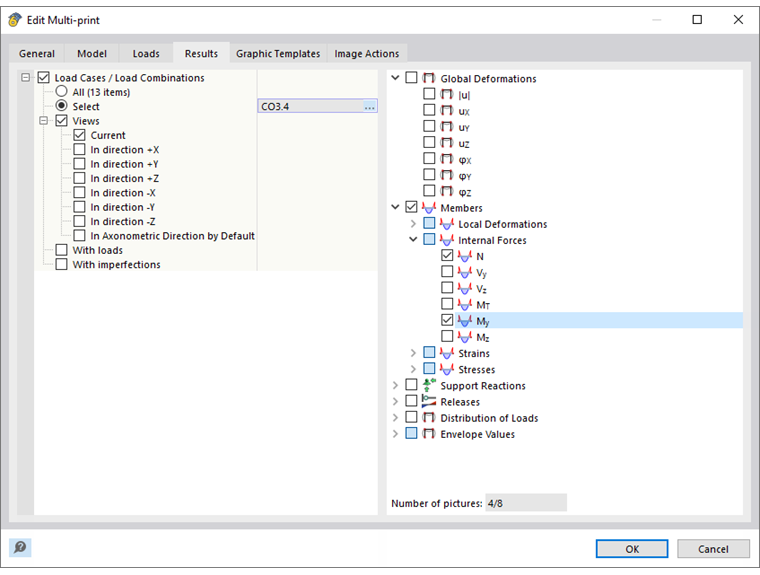
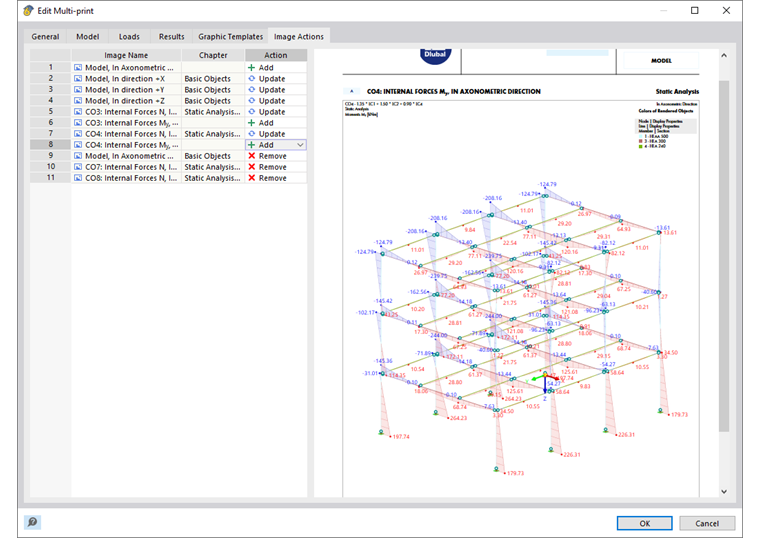
After you have made the changes, switch to the 'Image Actions' tab. It provides an overview of the graphics that are added or removed.