


Before editing objects, the corresponding model, load, or guide objects must be defined; that is, "selected". You can use various options depending on the object type and purpose.
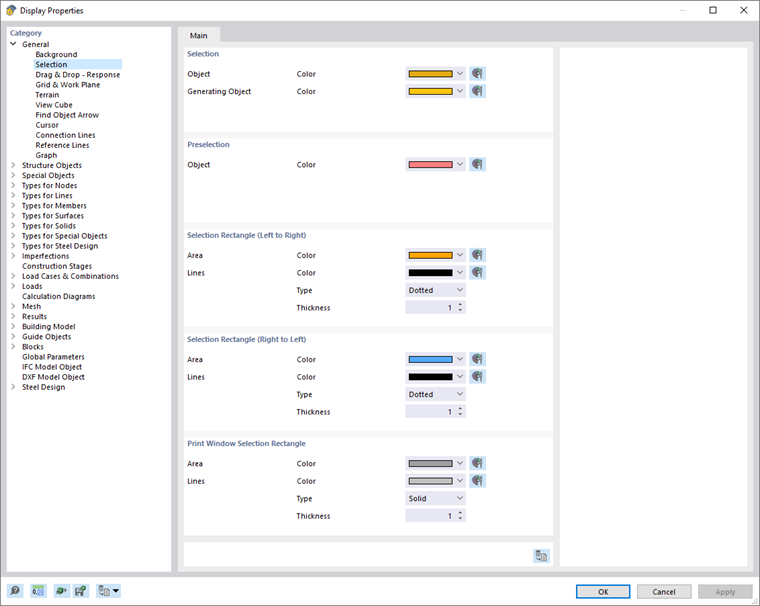
The selected objects are highlighted in a different color. You can customize the colors of the selection and preselection ("touching" an object with the cursor without clicking on it) in the "Display Properties" dialog box.
You can edit the properties of selected objects by double-clicking one of these objects. Alternatively, click Edit Selection in the Edit menu.
Selecting Objects Graphically
Selection with Mouse
To select an object in the work window, click it using the left mouse button. The object remains selected until you click on another object or in an empty area of the work window. If you want to add more objects to the selection, you have two options:
- Hold down the Ctrl key while clicking.
- Activate the "Add to Selection" setting by clicking the
 button.

Selection with Graphic Area
To select several objects in the work window at the same time, draw a window over the objects while holding down the left mouse button. The following applies: If you draw the window from left to right, all objects that are completely within the window are selected. However, if you draw the window from right to left, the selection also includes all objects that are only partially in this area. The assigned colors are managed in the Display Properties dialog box.
If selection via a window is inconvenient, you can use the selection buttons as an alternative. They are located to the left of the button used for controlling the selection (see the image Button for Selection Settings). They have the following meaning:
|
|
Selection by rhomboid |
|
|
Selection by elliptical area |
|
|
Selection by circular area |
|
|
Selection by freehand area ("Lasso") |
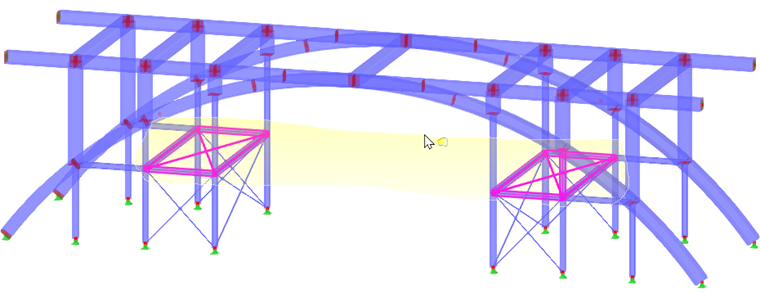
Selection using a lasso, for example, makes it easier to select objects in an isometric view. Encircle the objects while holding down the left mouse button. When you release the button, the objects within the marked area are selected. Again, the rule for directions described above for the window selection applies.
Selection in Plane
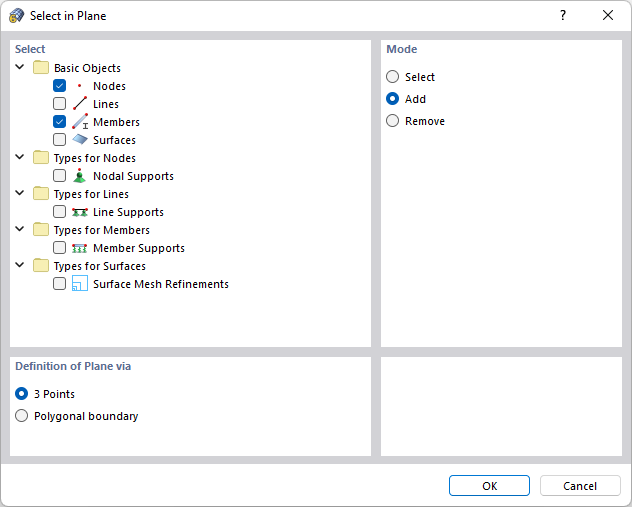
The "In Plane" function is available in the Edit → Select menu. It allows you to select objects that lie in an inclined plane, for example. Select the relevant objects in the "Select in Plane" dialog box. After clicking OK, you can define the plane graphically using "3 Points" or a "Polygonal boundary".
Selecting Free Nodes
You can use the "Free Nodes" function in the Edit → Select menu to select all nodes that have no function for other objects (for example, for defining lines, surfaces, or loads). To delete these nodes, press the Del key.
Selecting Related Objects
When you have selected a surface, the corresponding lines and nodes are not included in the selection. With the "Related Objects" function in the Edit → Select menu, you can integrate the components of selected objects into the selection.
Finding Object with Number
For larger models, it is often difficult to find a certain object in the work window. Using the Find via Number function in the Edit menu, you can initiate a search based on the object number.

In the list, define the "Object" that you want to find. Then, enter the "No." of the object, or select the number from the list.
After clicking OK, the found object is selected in the work window and indicated by an arrow. The arrow remains displayed even if you adjust the area around the object by zooming or rotating. Clicking on the workspace will hide it again.
Selecting Objects via Navigator
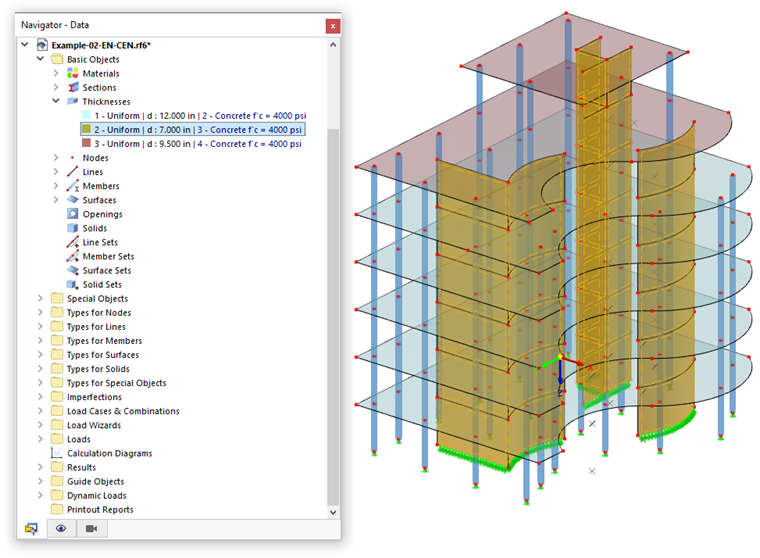
You can select an object by clicking the corresponding entry in Navigator – Data. This function also extends to the object properties: For example, if you select a cross-section or a surface thickness in the navigator, all objects to which the cross-section or the thickness is assigned are selected in the work window. This way, you can quickly select objects for editing without activating the visibilities in the "Navigator – Views".
Selecting Objects via Table
You can select a model or load object by clicking the corresponding table row in the Structure or Loads table.
The graphical selection via table is only possible if the
![]() button in the table toolbar is activated (default).
button in the table toolbar is activated (default).
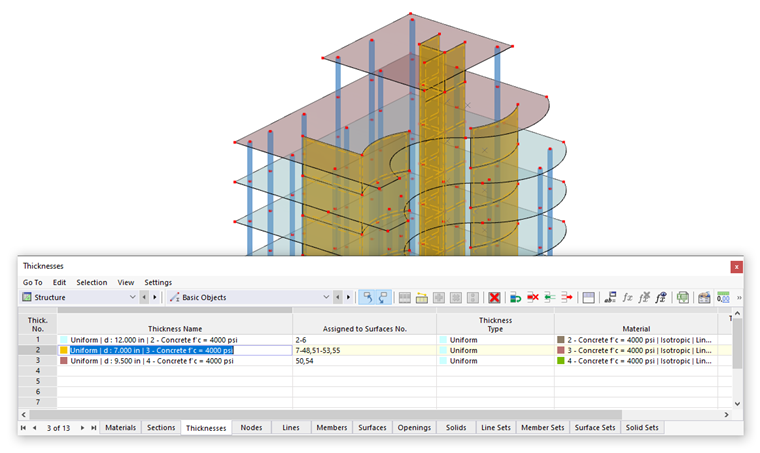
In the tables, you can select objects by means of certain properties: For example, if you select the row of a cross-section or a surface thickness, all objects to which the cross-section or the thickness is assigned are selected in the work window.
Selecting Objects in Object Selection
The Object Selections provide a variety of possibilities for selecting objects according to certain criteria. You can change the selection criteria in the New Object Selection dialog box and save each object selection as an auxiliary object. The functions are described in the chapter Object Selections.